AtariBits
  • Home
  • Systems
    • 576NUC
    • 1088XEL >
      • XEL-CF Drive
      • XEL-CF3 Rapidus Variant
      • Accessories
      • XEL Archives
    • 1088XLD >
      • RGB2VGA-XLD
      • ARROW2JOY-XLD
  • TransKey
    • TK-II >
      • TK-II Manual
      • Installation
      • Device Compatibility
      • TK-II Archives
    • TK-II-STEREO
    • TK-II Control
  • XEP80-II
  • JOY2PIC
  • MOUSE
  • MIDI
    • MIDI 3D Printed Cases
  • UGV
  • SDrive
  • Blog

My 1200XL has a Multiple Personality Disorder (Part 2)

5/1/2022

 
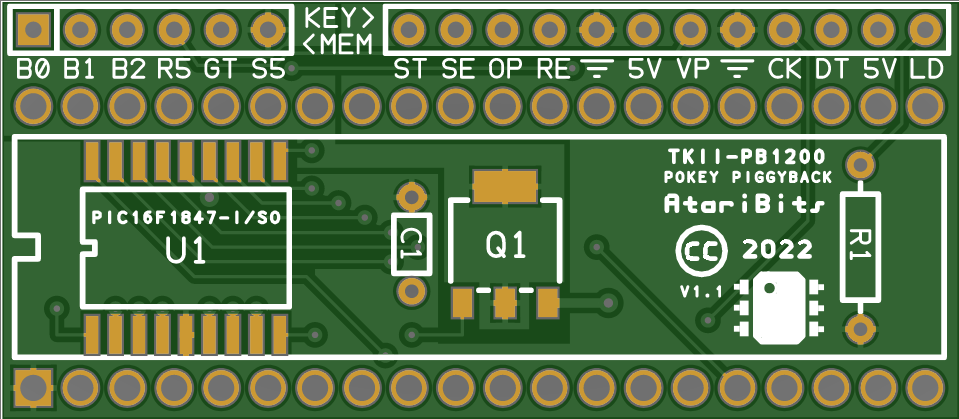
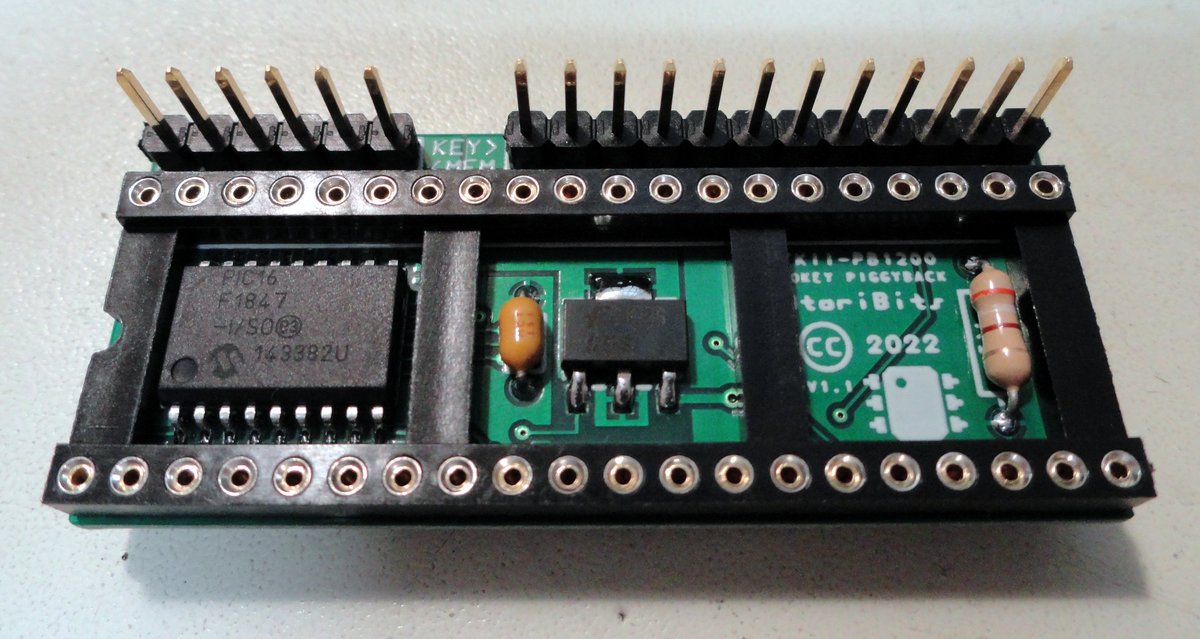
Today I'll be talking about how to operate this system, since Part 1 already went in depth on what hardware and modifications were required.

Below is a table covering basic operation of the system in order to select what OS you want active, and if desired, what Language SLOT you want selected as well.

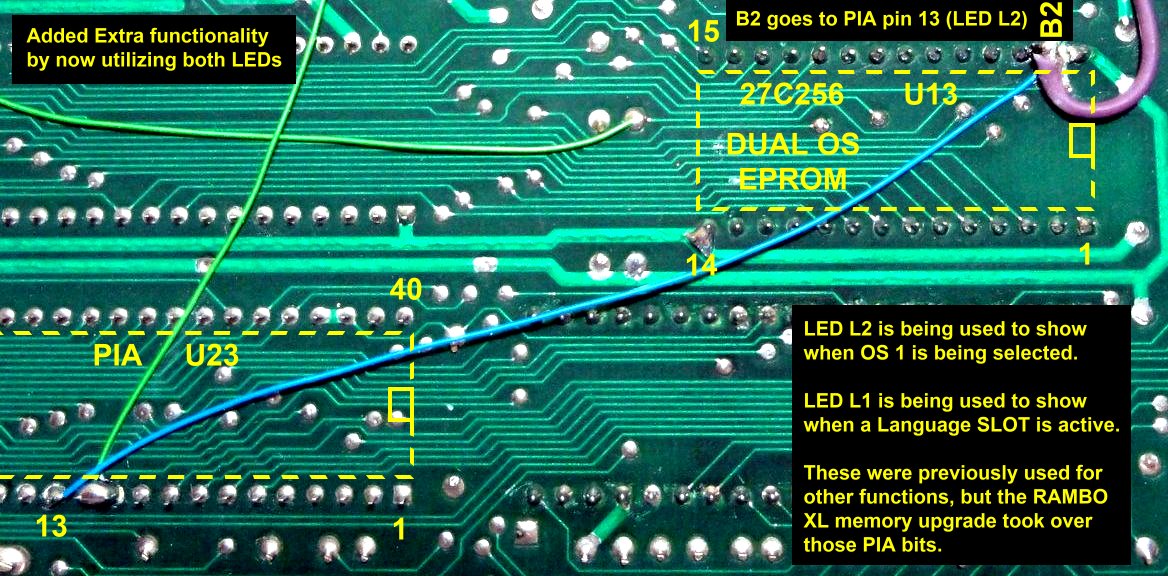
As can be seen the original L1 and L2 LEDs have been reassigned to indicate whether a SLOT or Cartridge is inserted (L1), or what OS is in play (L2). When SHIFT is added to any one of the selection hot keys, it simply modifies which OS is to be used, by selecting the 2nd bank of the OS EEPROM, with the first bank holding the default OS.

Note: The last selection that you make is stored in non-volatile EEPROM memory, and restored upon the next power-up of the system - resuming where you left off.
SELECT
STOCK 1200XL Keyboard
Optional PS/2 Keyboard
LED L1
LED L2
SLOT 1 + OS 1
F1
ALT+F1
ON
ON
SLOT 2 + OS 1
F2
ALT+F2
ON
ON
SLOT 3 + OS 1
F3
ALT+F3
ON
ON
SLOT 4 + OS1
F4
ALT+F4
ON
ON
NO SLOT + OS 1
OPTION+F1
ALT+ESC
OFF
ON
+ OS 2
ADD SHIFT
ADD SHIFT
NO CHANGE
OFF
To make this concept a bit easier to understand, I did a short demonstration video of the system in action.
Keep in mind that any two Atari 8-Bit OS variants can be used. So for instance you could have OmniView 80 in one bank and the stock XL/XE in the other. Same goes for the Language EPROM, where any combination of four 8K language, application, and/or games could be pre-programmed.

This is what I have in my test EPROMS at the moment.

32K Dual OS (27C256 EPROM)
  1. OS 1 = HSIO patched XL/XE (default)
  2. OS 2 = Stock XL/XE (selected with SHIFT)     I changed this to OmniMon XL, and it works great!
32K Quad Language (27C256 EPROM)
  1. SLOT 1 = BASIC RevC
  2. SLOT 2 = Altirra BASIC
  3. SLOT 3 = Assembler/Editor
  4. SLOT 4 = SpeedScript

Each time a new selection is made, a Cold Restart (similar to Bob Woolley's FREEZER) is initiated in order to reboot into the new configuration without requiring a power cycle of the computer. Whereas the SIO 5V/Ready signal is power cycled to reboot something like an SDrive sitting on that serial bus.

This is all perfectly timed, and happens automatically in the background when changing selections.

I think that covers it for today, but stay tuned, because there might be a Part 3 if I decide to get into how the code in the TKII-PB1200's PIC chip performs some of this magic.

- Michael

My 1200XL has a Multiple Personality Disorder (Part 1)

4/29/2022

 
It all started out with me wanting to do a few updates to a 1200XL that Bob Woolley had given me in 2015 to get me back up to speed, since I no longer had any Atari 8-bit computers at the time.

And because of many other projects competing for my attention, that poor 1200XL had been sitting in a box under my workbench for the last couple of years, with the only mod being a TK-II Pokey piggyback board which I had installed when the stock keyboard started getting flaky.

So I guess it was about two months ago that I pulled it out of the box and installed a new at the time internal SDrive-Simple board, which actually came out very nice with an almost invisible SD card slot in the rear being just below the overhang in the top part of the case. After playing around with it for a bit, I started reading an older post on AtariAge about converting from the stock 1200XL OS over to an 800XL OS, and incorporating internal Basic. This sounded cool, and is why my Multiple Personality adventure began.

The instructions I found online...
add_800xl_os_and_basic_to_1200xl.pdf
File Size: 29 kb
File Type: pdf
Download File


Initially I followed the instructions as written,  but with the only EPROMs I had on hand being 32 Kbyte (27C256), I had a lot of extra space that would inevitably get wasted. 32K was four times what I needed for Basic, and twice what was required for the OS. So this got me thinking... why not use all that extra space to have four different 8K languages and/or applications, and two different OS variants. And to make the selection of these a bit more sophisticated then merely some physical switches, why not make a special version of the TK-II that could make these selections via keyboard control. The challenge was to bring this all together, from both a hardware and firmware aspect.

So I designed a new Pokey piggyback board that would break-out some of the PIC's I/O that could be used for banking the ROMs, and to execute a Cold Restart when changing selections, thus eliminating the need to cycle power in order to reboot with the new configuration. On the first iteration of this new TK-II board I had one left over I/O bit, but as the experiments progressed I quickly realized that a simple Cold Restart was not going to be enough to have the SDrive also reboot, so that extra I/O bit got used for switching a MOSFET ON and OFF to control power for the SIO 5V/Ready line.

Here's what the final form of the new TKII-PB1200 board looks like both schematically and graphically...

tkii-pb1200_v1.1_schema.pdf
File Size: 31 kb
File Type: pdf
Download File

TOP VIEW
Picture
BOTTOM VIEW
Picture
ASSEMBLED BOARD
Picture
To put this all into play required extensive modifications to the 1200XL, which I have put together a pictorial to show the changes. Please note that there was limited room to label the TKII-PB1200's header pins, so I opted for two letter IDs, and have used these same IDs in the pictorial showing where the TKII-PB1200's header wires go.

First order of business was to substitute 28 Pin sockets for the original 24 pin ones which had held the split two part 1200XL OS, as well as some 'W' jumper rearrangement to make it address the new larger EPROMs. The trace cut below is not part of the original 800XL conversion, and was done to facilitate banking of the multi-language EPROM. And for the same reason, there are some additional trace cuts done on the bottom side between pin 27 and pin 28 of both EPROMS.
Picture
Here you see the new TKII-PB1200 board installed into Pokey's socket, with the Pokey piggybacking on top.
Picture
Console and Reset switch connections.
Picture
The next series of pictures will map out the additional trace cuts and jumper wires to fully bring this into reality.

The trace cut next to U17 severs the connection of the GTIA PIN 11 (TRiG3 input) to RD5 on the cartridge port so that we can separately signal the GTIA that a cart has been changed as part of our Cold Restart function (thank you Bob Woolley for your FREEZER article).
Picture
Here you can see the connection of the Bank Selection bits (B0-B2) that will determine which 8K SLOT of the language EPROM and which 16K OS will be in play. Also we can see the RD5 input going over to the TKII-PB1200 via the brown wire. This will tell the TKII-PB1200's PIC chip whether a  real cart has been inserted or not so that it can take appropriate action when executing a Cold Restart.
Picture
Below can be seen a light green Jumper wire going from pin 18 on the 800XL MMU (U14) over to pin 11 on the PIA chip (U23). This allows Basic, or in our case the language SLOTs, to be enabled.

Pin 23 on the CPU is A13 which needs to be routed over to the OS ROM (U13) via one of the pads from the removed W6 jumper.
Picture
UPDATE 4-30-2022:  Added the blue jumper wire between the Dual OS socket (U13) and pin 13 of the PIA (U23) to enable the L2 LED to indicate when the primary OS (OS 1) is selected.
Picture
This is the 2nd part of our Cold Restart circuit coming from the TKII-PB1200's PIC chip via the orange wire, and feeding into the TRiG3 input (pin 11) on the GTIA chip (U19).
Picture
And finally we remove resistor R63 which is no longer needed and attach the green wire coming from the TKII-PB1200 board to allow it to control the SIO 5V supply.
Picture
Since I just happened to have a spare UAV, Sophia RevC, and a RAMBO XL, I went ahead and installed them as well. This system will now become one of my daily drivers, no longer relegated to sitting in a box.

Because I also needed the flaky 1200XL stock keyboard to work reliably once again, I purchased and installed the Best Electronics 1200XL replacement mylar kit (P/N: CB103156). It worked like a charm! And basically it was as easy as peeling off the old membrane, cleaning the PCB with acetone, burnishing the contact pads with the anti-tarnish paper that's provided in the kit, placing the thin PCB and the new mylar (also in the kit), aligning all of this with the keyboard side, and screwing in all of those very tiny securing screws.

              And for those that may be interested, here are the details on the RAMBO XL installation.

I installed a right angle header on the RAMBO XL board for the PBx connections, and luckily it just cleared the Sophia board, although I am using an additional machine pin socket on both devices to get some extra clearance above the surrounding components.

The RAMBO XL board takes the place of U10 (74LS158), plugging into the same socket that the IC was removed from.

     Notice the position of the shorting block on the RAMBO XL board for proper 1200XL configuration.
Picture
Here we see the other end of the PBx connections to the PIA (U23) chip. The PIA was first removed, the 12-16 pins were bent up, and then the PIA gets plugged back into it's socket. Afterwards the wire ends are soldered to the bent up pins in the order shown below.
Picture
And here's where I chose to mount Sophia's DVI connector, plus take note of the switching regulator modules in place of the original linear regulators that ran very hot, thus requiring a large heat sink that we no longer need anymore thanks to the very cool running switching regulators.
Picture
OverView of Completed Upgrades
Picture
Click on Image to Enlarge
Stay tuned for Part 2 of this project, where I'll describe how the TKII-PB1200 board allows control of the OS and Language SLOT selection via both an external PS/2 keyboard, or through the use of the internal stock 1200XL keyboard's function keys (no PS/2 keyboard required).

- Michael

    Author

    My name is Michael St. Pierre and in the early 90's I decided to create my very first Atari 8-Bit upgrade. It was called TransKey.
    ---Then soon after Atari folded and I left the scene ---
    25 years later I came back with a mission to improve upon what I had started so long ago.

    Archives

    January 2023
    December 2022
    August 2022
    May 2022
    April 2022
    December 2021
    October 2021
    July 2021
    June 2021
    May 2021
    April 2021
    March 2021
    February 2021
    January 2021

    Categories

    All
    576NUC+
    AtariBits News
    ColecoVision
    Industrial Applications
    Intro
    Monster 600XL
    Multi-SLOT 1200XL
    Transkey
    XEP80-II

    RSS Feed

Powered by Create your own unique website with customizable templates.