And because of many other projects competing for my attention, that poor 1200XL had been sitting in a box under my workbench for the last couple of years, with the only mod being a TK-II Pokey piggyback board which I had installed when the stock keyboard started getting flaky.
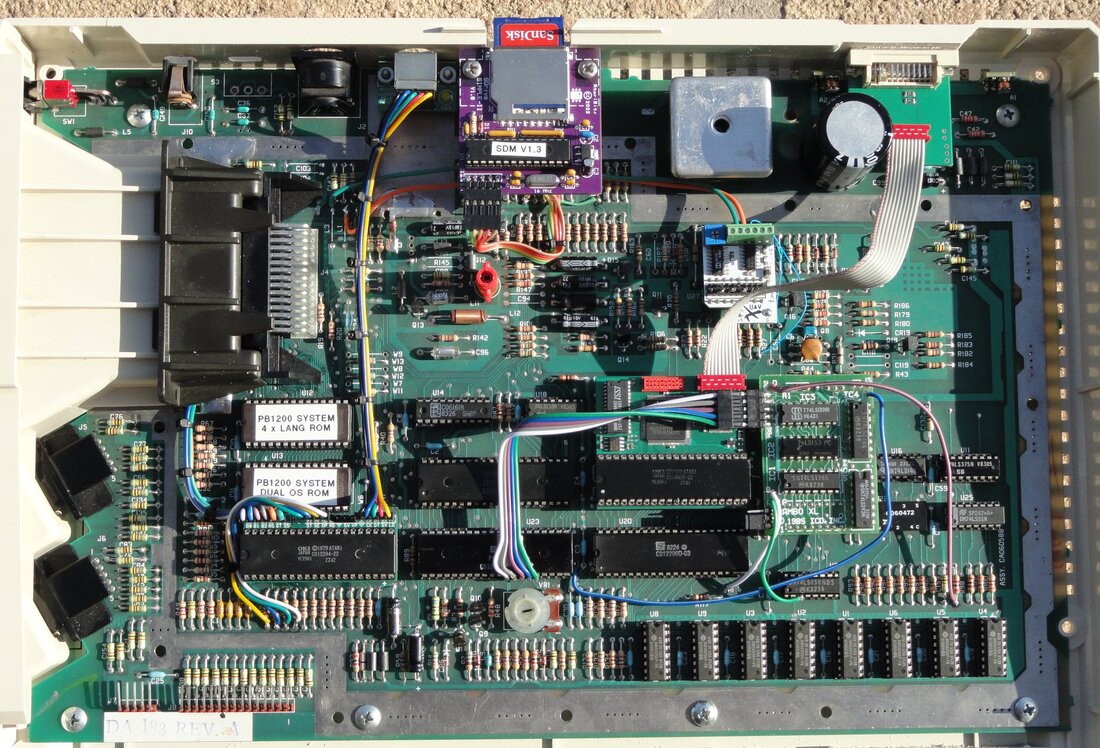
So I guess it was about two months ago that I pulled it out of the box and installed a new at the time internal SDrive-Simple board, which actually came out very nice with an almost invisible SD card slot in the rear being just below the overhang in the top part of the case. After playing around with it for a bit, I started reading an older post on AtariAge about converting from the stock 1200XL OS over to an 800XL OS, and incorporating internal Basic. This sounded cool, and is why my Multiple Personality adventure began.
The instructions I found online...
| add_800xl_os_and_basic_to_1200xl.pdf |
Initially I followed the instructions as written, but with the only EPROMs I had on hand being 32 Kbyte (27C256), I had a lot of extra space that would inevitably get wasted. 32K was four times what I needed for Basic, and twice what was required for the OS. So this got me thinking... why not use all that extra space to have four different 8K languages and/or applications, and two different OS variants. And to make the selection of these a bit more sophisticated then merely some physical switches, why not make a special version of the TK-II that could make these selections via keyboard control. The challenge was to bring this all together, from both a hardware and firmware aspect.
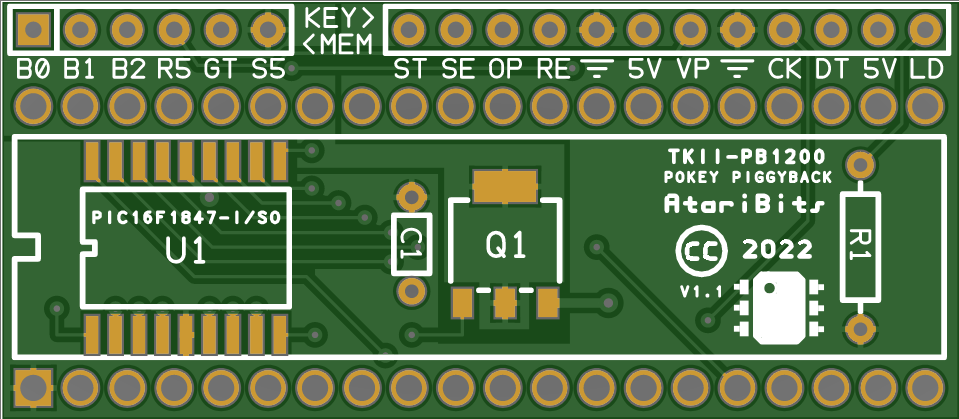
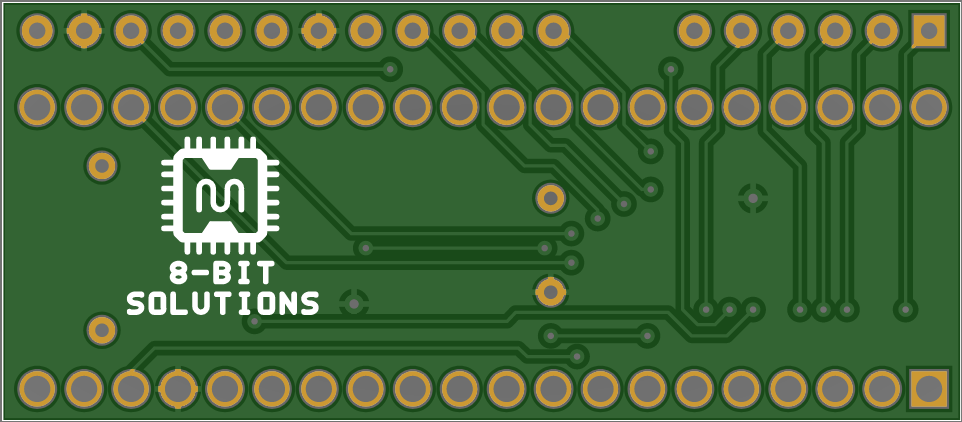
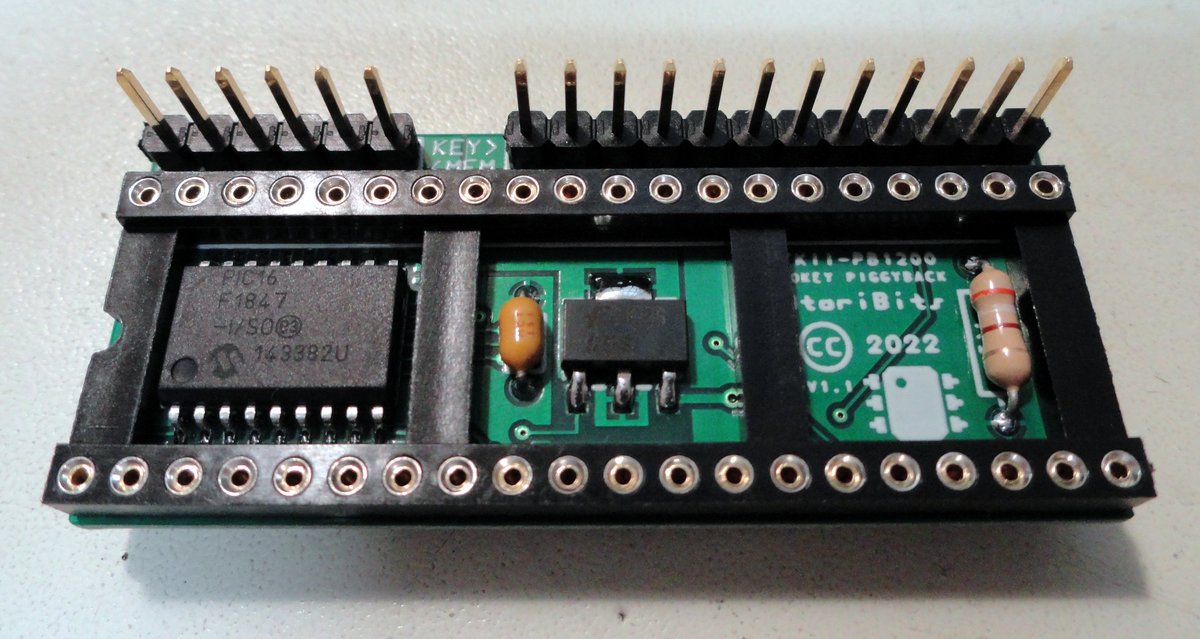
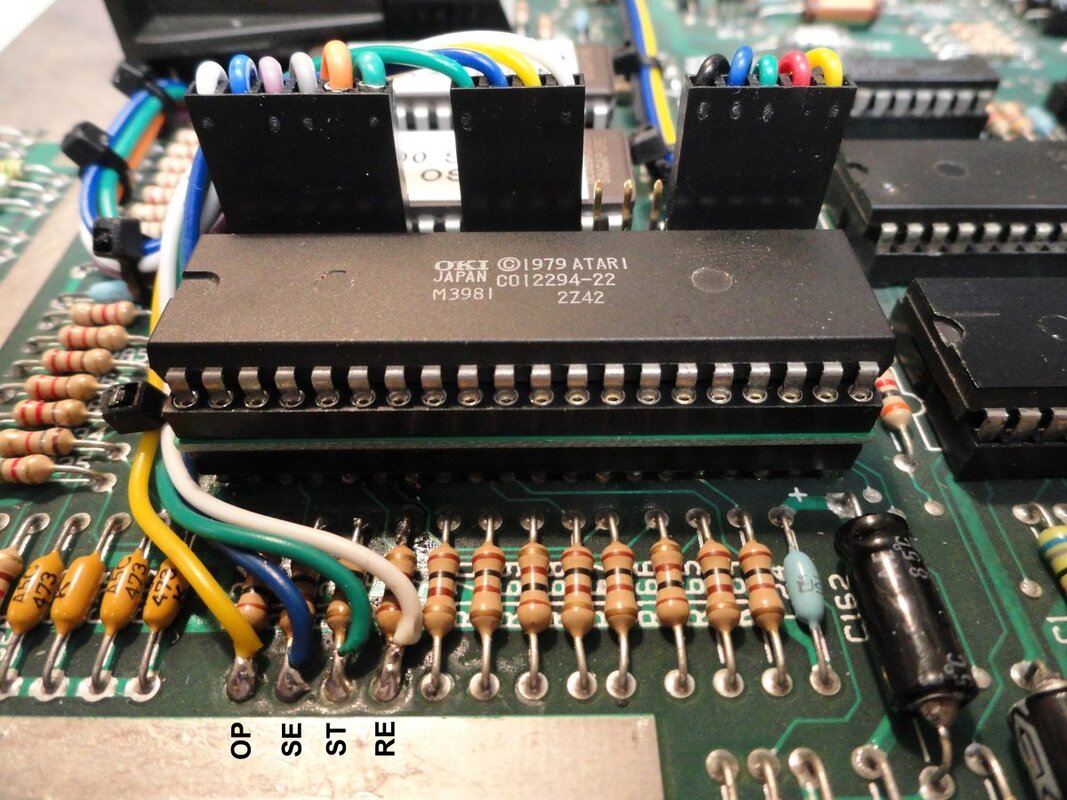
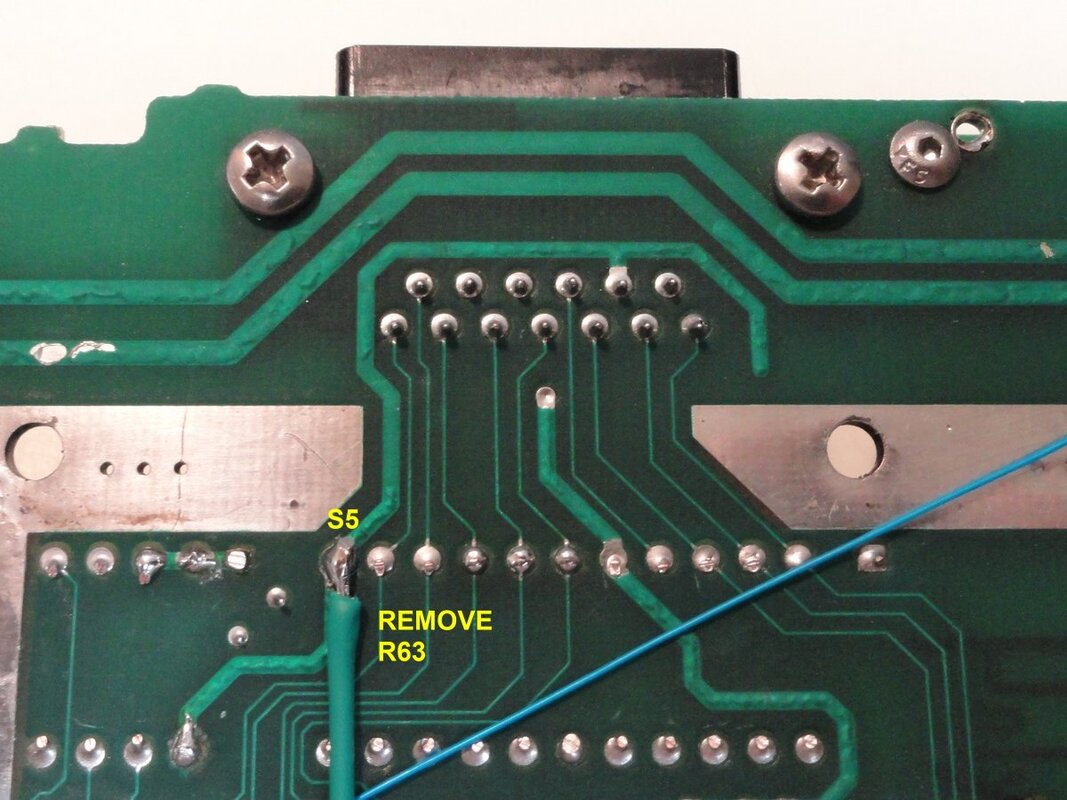
So I designed a new Pokey piggyback board that would break-out some of the PIC's I/O that could be used for banking the ROMs, and to execute a Cold Restart when changing selections, thus eliminating the need to cycle power in order to reboot with the new configuration. On the first iteration of this new TK-II board I had one left over I/O bit, but as the experiments progressed I quickly realized that a simple Cold Restart was not going to be enough to have the SDrive also reboot, so that extra I/O bit got used for switching a MOSFET ON and OFF to control power for the SIO 5V/Ready line.
Here's what the final form of the new TKII-PB1200 board looks like both schematically and graphically...
| tkii-pb1200_v1.1_schema.pdf |
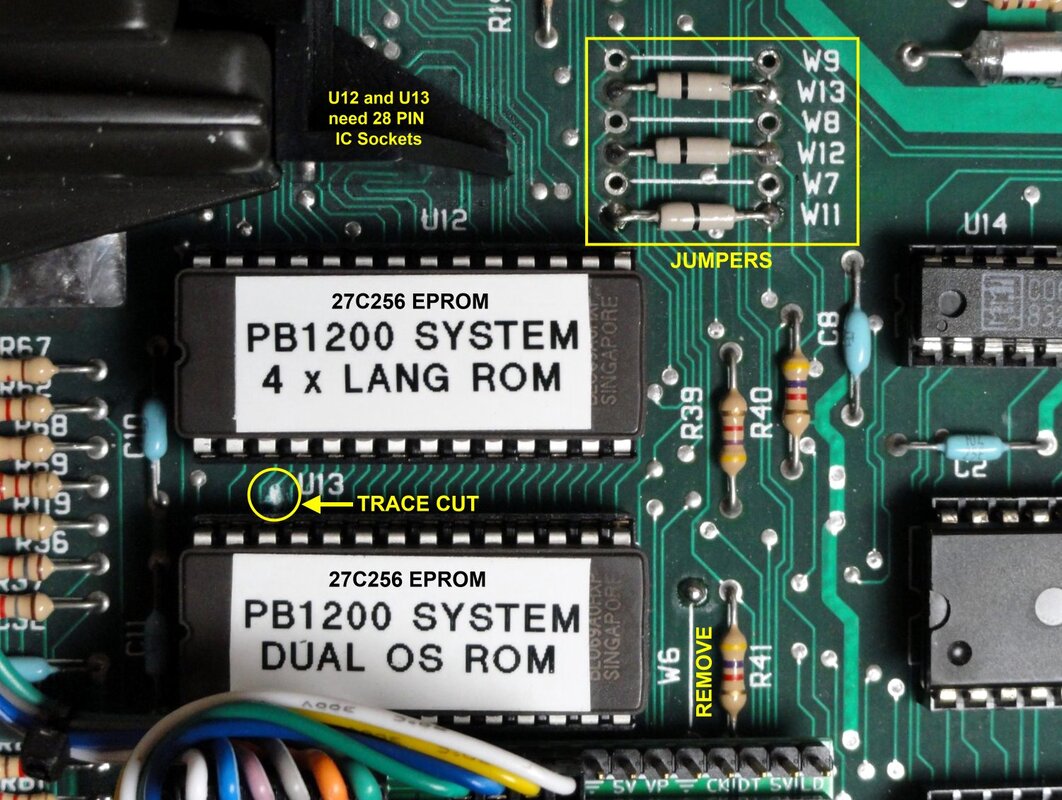
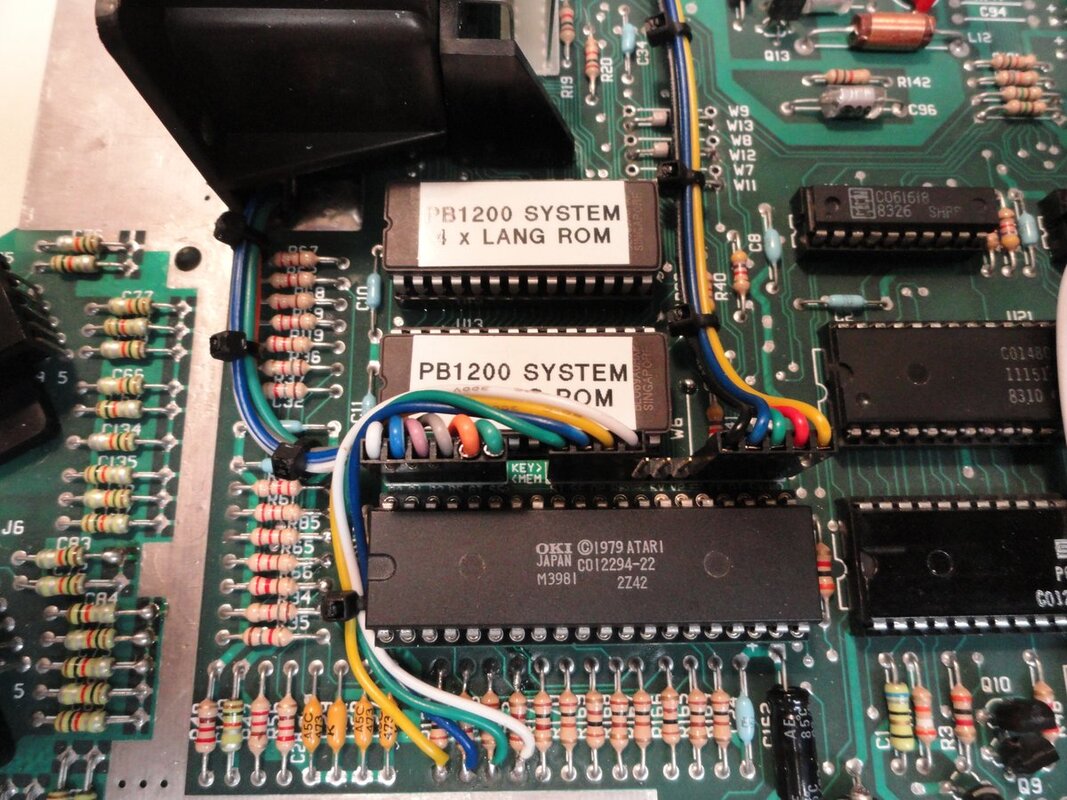
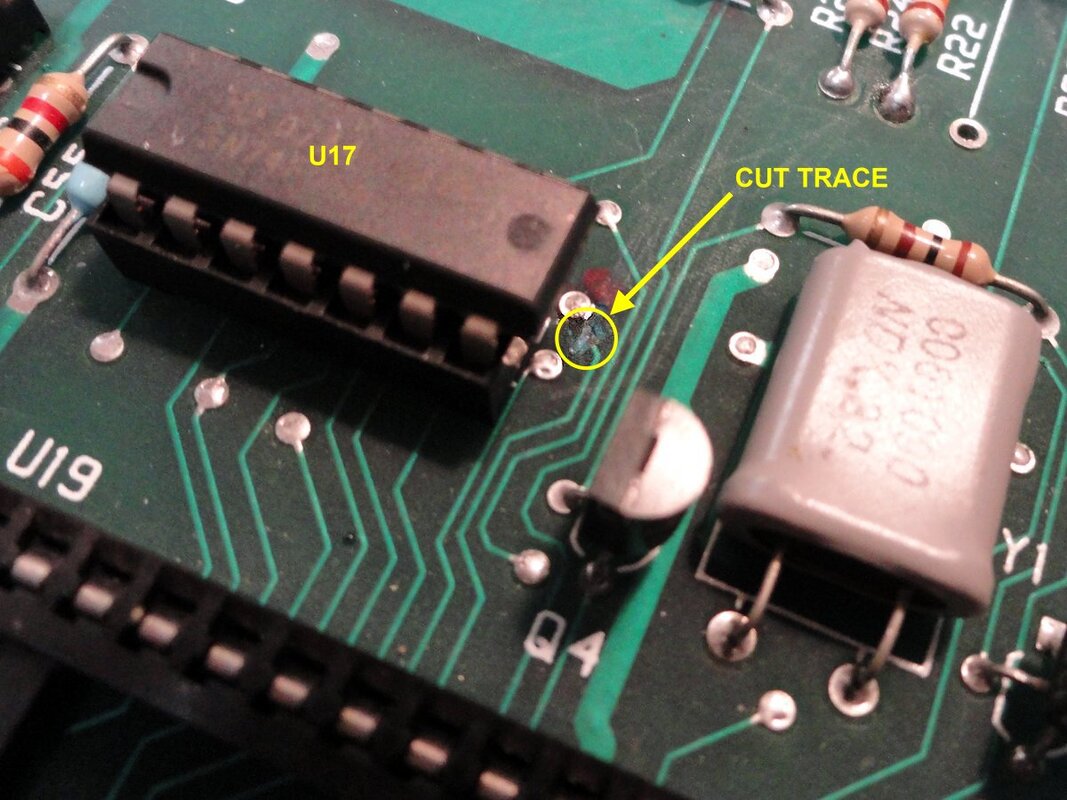
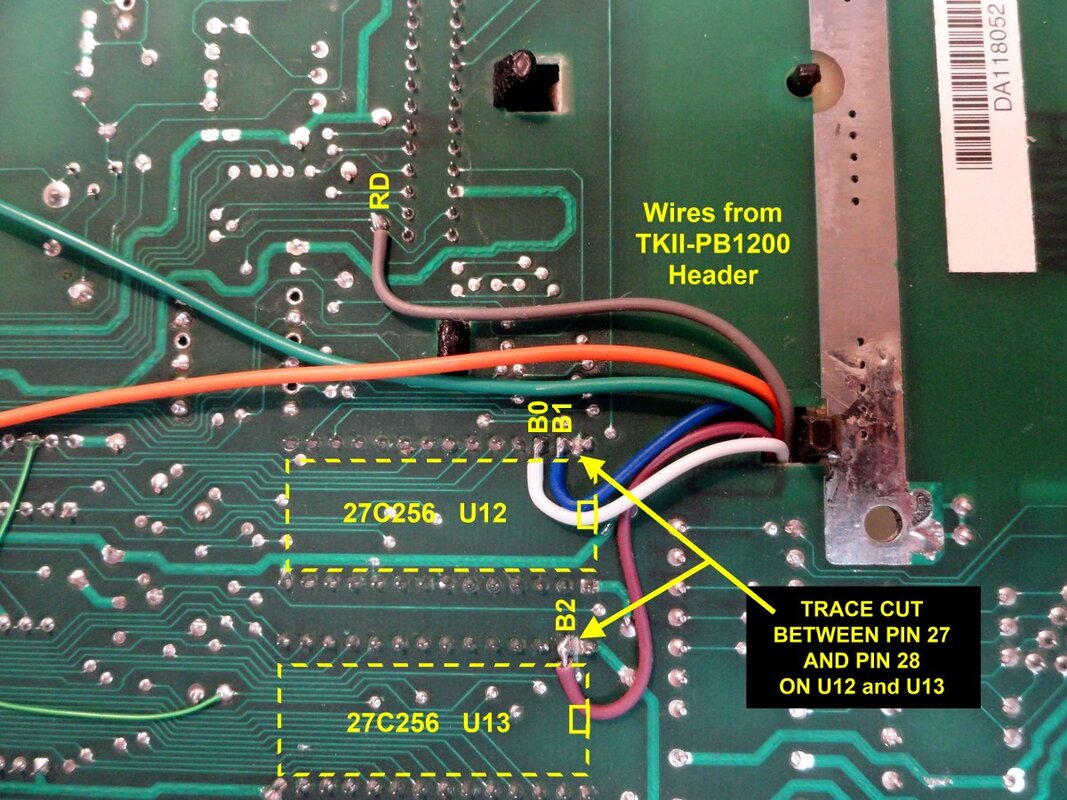
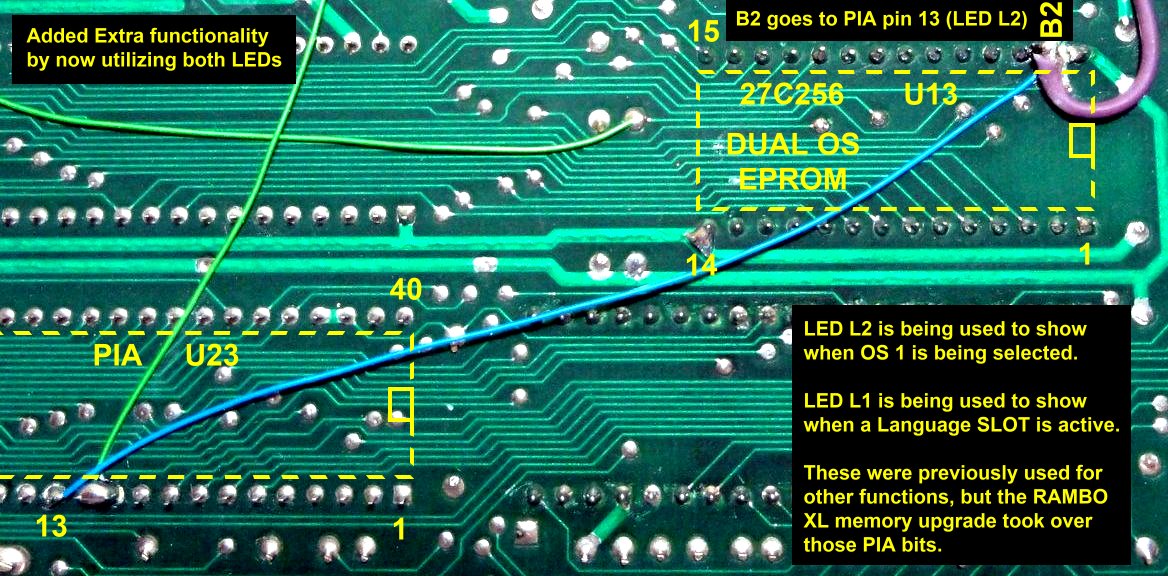
First order of business was to substitute 28 Pin sockets for the original 24 pin ones which had held the split two part 1200XL OS, as well as some 'W' jumper rearrangement to make it address the new larger EPROMs. The trace cut below is not part of the original 800XL conversion, and was done to facilitate banking of the multi-language EPROM. And for the same reason, there are some additional trace cuts done on the bottom side between pin 27 and pin 28 of both EPROMS.
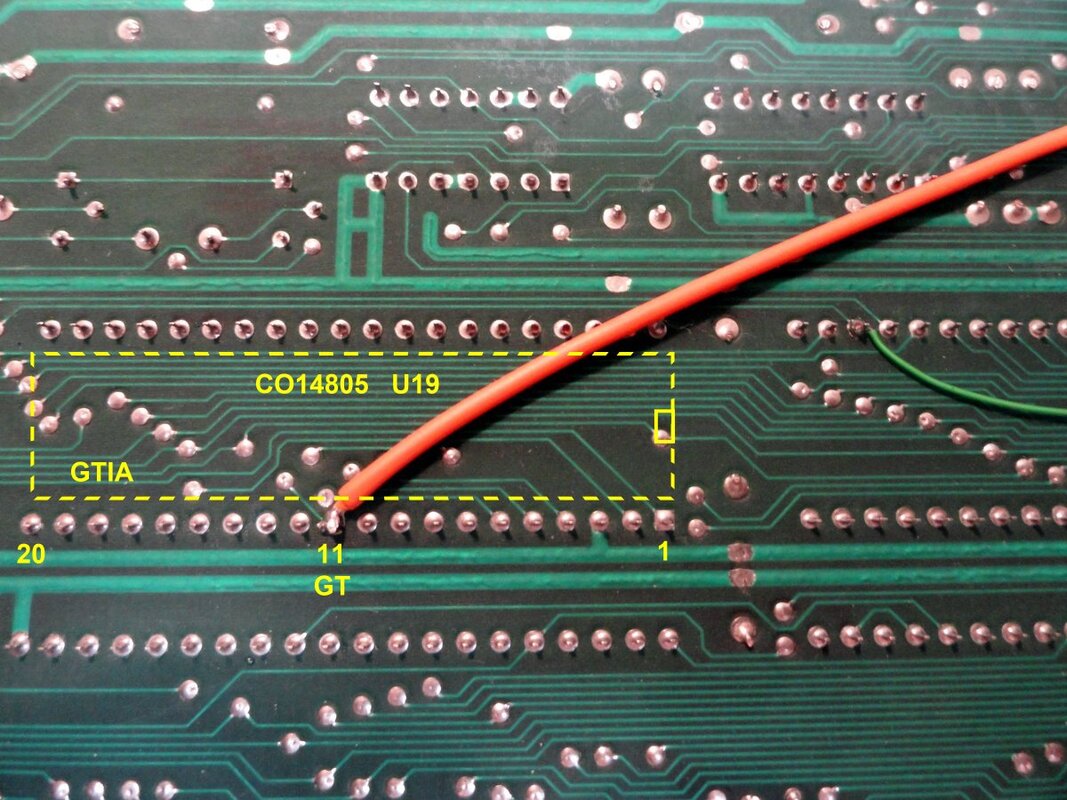
The trace cut next to U17 severs the connection of the GTIA PIN 11 (TRiG3 input) to RD5 on the cartridge port so that we can separately signal the GTIA that a cart has been changed as part of our Cold Restart function (thank you Bob Woolley for your FREEZER article).
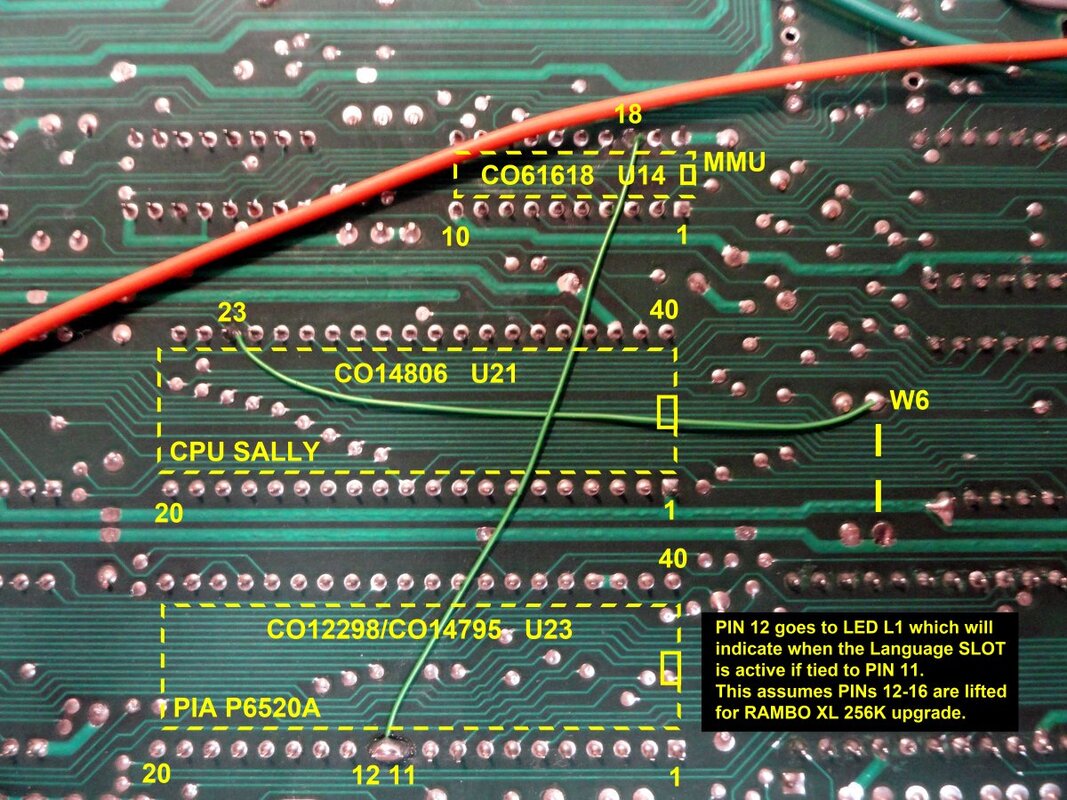
Pin 23 on the CPU is A13 which needs to be routed over to the OS ROM (U13) via one of the pads from the removed W6 jumper.
Because I also needed the flaky 1200XL stock keyboard to work reliably once again, I purchased and installed the Best Electronics 1200XL replacement mylar kit (P/N: CB103156). It worked like a charm! And basically it was as easy as peeling off the old membrane, cleaning the PCB with acetone, burnishing the contact pads with the anti-tarnish paper that's provided in the kit, placing the thin PCB and the new mylar (also in the kit), aligning all of this with the keyboard side, and screwing in all of those very tiny securing screws.
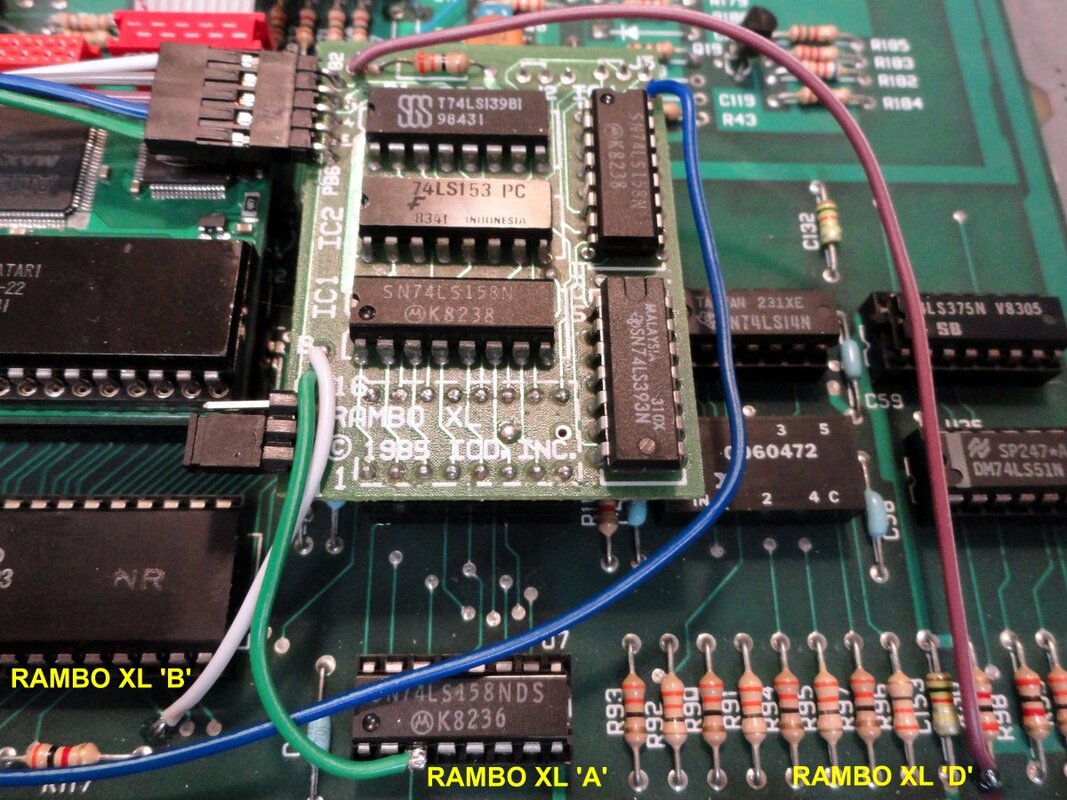
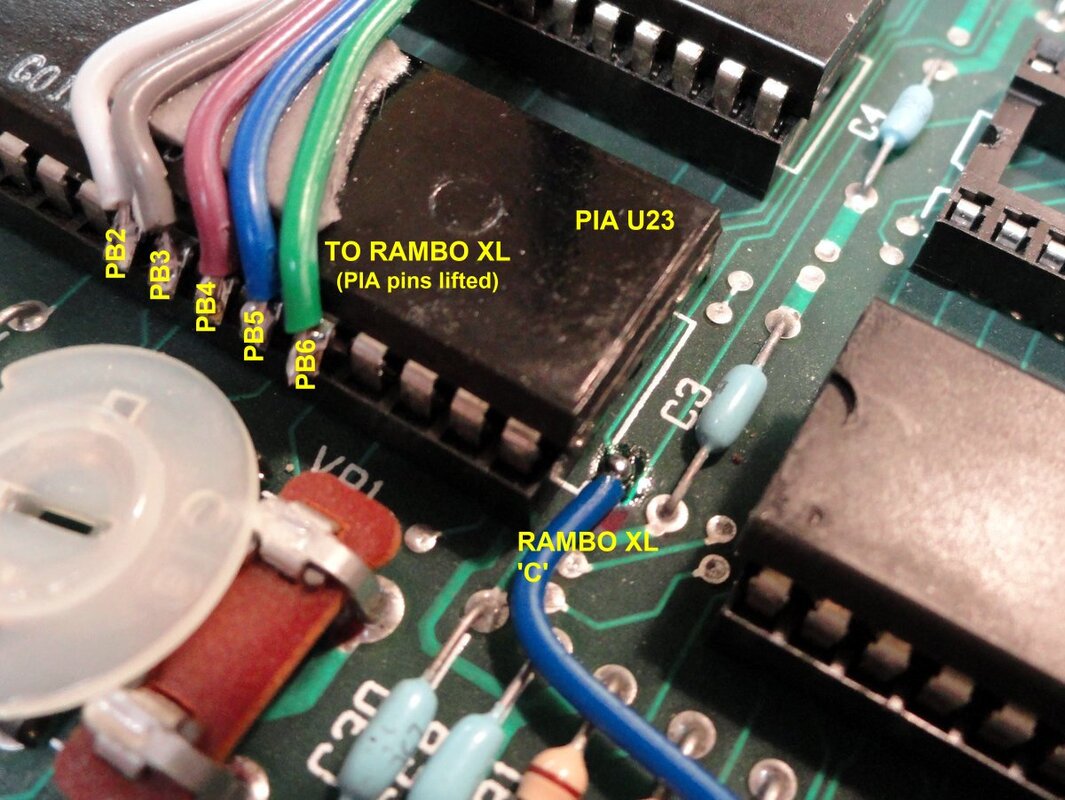
And for those that may be interested, here are the details on the RAMBO XL installation.
I installed a right angle header on the RAMBO XL board for the PBx connections, and luckily it just cleared the Sophia board, although I am using an additional machine pin socket on both devices to get some extra clearance above the surrounding components.
The RAMBO XL board takes the place of U10 (74LS158), plugging into the same socket that the IC was removed from.
Notice the position of the shorting block on the RAMBO XL board for proper 1200XL configuration.
- Michael

 RSS Feed
