|
CV-NUC+ Miniature ColecoVision Game Console
The CV-NUC+ is the most compact ColecoVision Video Game System Clone ever produced that's still based upon some of the original chips made back in the day, while using many of the CMOS counterparts to minimize heat and power consumption. Its primary focus was portability and to take up the minimum amount of desktop space, while still recreating the original plug-in game cartridge experience. But there's more... Later as the design evolved, MSX compatibility became a primary focus by adding 32 times the original system RAM and incorporating a 2nd sound chip (Yamaha YM2149F), which adds another 3 voices for a grand total of six (+ two noise channels). These additions enable this system to play all the SGM game conversions that were derived from their MSX computer system origins. WARNING: Not all SGM Physical Carts are guaranteed to work, although the equivalent digital download versions using an AtariMax Ultimate Cart often times will work. Time for an Intermission? A hardware Pause feature was also added via a momentary push button switch that toggles between the pause and active game functions, allowing you to freeze 'any' game in its tracks, then go grab a snack, and resume the game play when you are good and ready, picking up where you left off. |
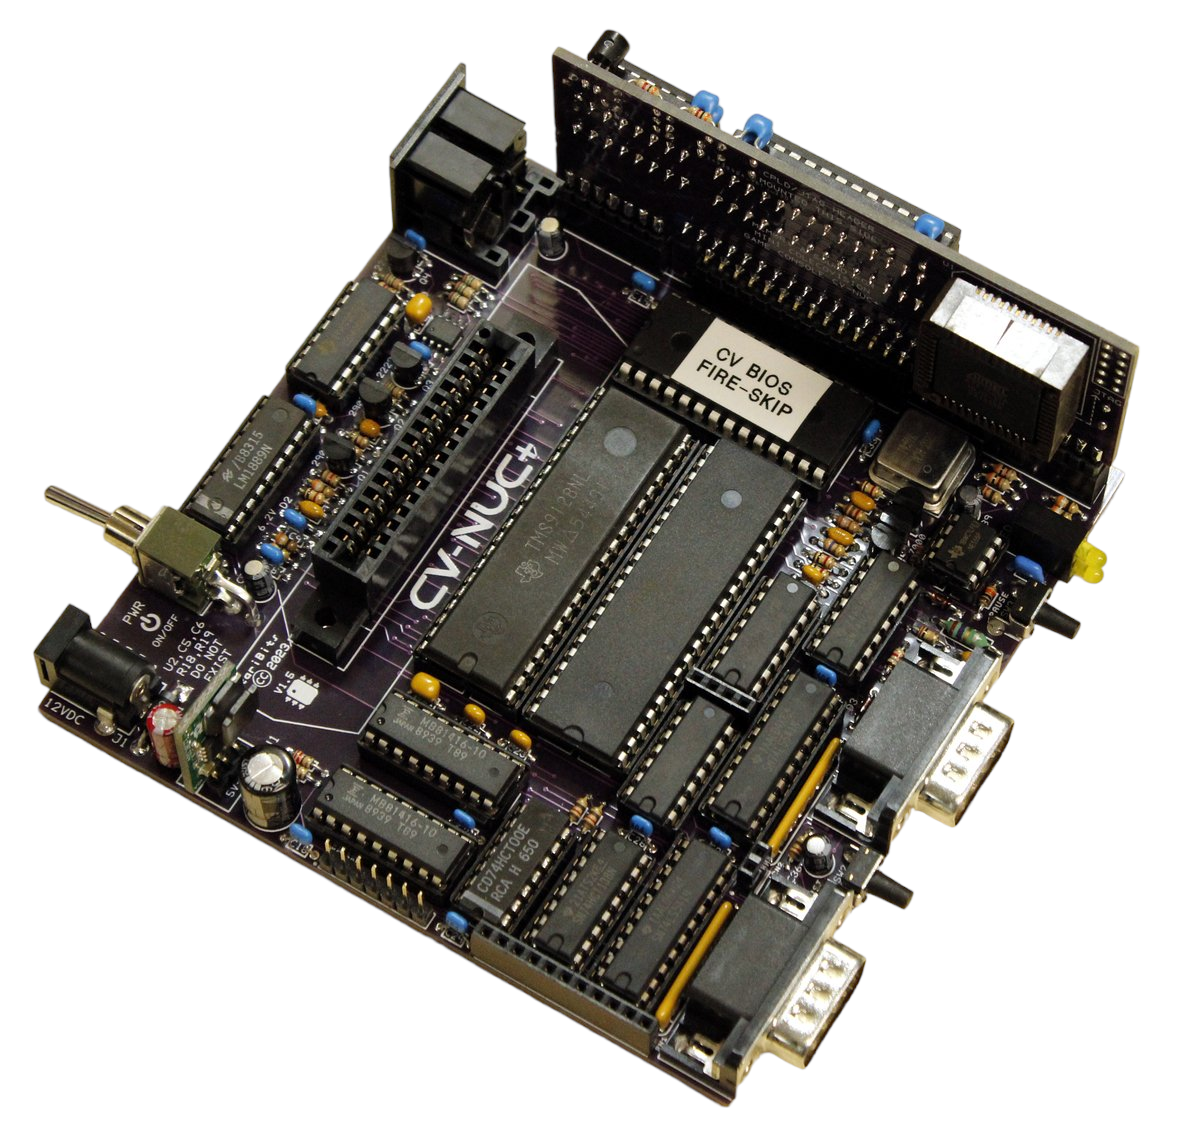
CV-NUC+ Main Board and MSX Module
- Click on Image to Enlarge -
|
Did someone see a Mouse?
Because of the difficulty in finding a decent roller-controller still in working condition, the CV-NUC+ comes with a USB Mouse input that emulates the roller-controller in a more modern way. Giving an unprecedented smooth and 'quiet' way to move within a game, and to do so wirelessly, while requiring very little table space. Gaming has never been so easy!
This part of the CV-NUC+ project wouldn't have been possible without leveraging another open source project for an Atari ST mouse alternative. The project known as the Atari-Quadrature-USB-Mouse-Adapter is discussed in detail by JJ Michel in his Misc. Projects & Random Useless Stuff - blog and apparently it went through various iterations to arrive where I found it. However it definitely wasn't useless to me, and proved to be invaluable to having a working mouse on the CV-NUC+.
It appears that it will work with most all Logitech USB wireless mice, and even recognizes the center button along with the left and right buttons to selectively fire from all 3 missile silos in the CollectorVision game Armageddon making for exciting game play. Obviously it would be cost prohibitive to buy and test every single mouse on the market, so I have recommended a few down below that I know do work properly from actual experience (I'll add to this list when more mice are known to work).
Standard Roller-Controller and Steering Wheel controllers can still be used by simply disconnecting the mouse receiver and then cycling the power, which resets the mouse chip to recognize that no mouse is presently in use. This puts it into a non-blocking state thereby allowing external roller-controllers to function (this is also required of certain AtariSoft games to get past the start-up screen).
|
Mouse Button Assignments for Listed Games
If both the left and right mouse buttons are simultaneously pressed and held for at least 2 seconds, then the asterisk * key is sent, useful in some games such as Slither to pause or restart the game.
|
|
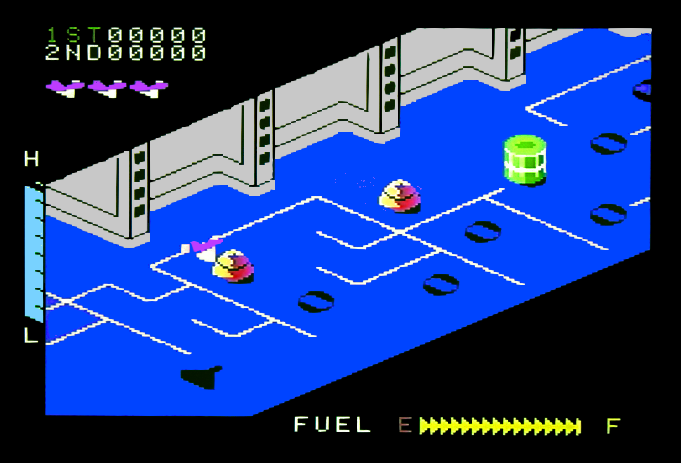
Mouse Compatible Games
|
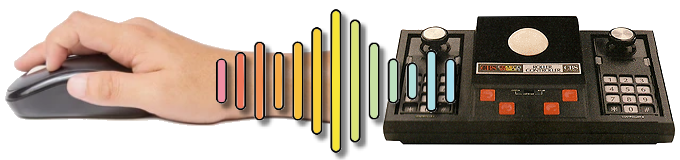
Compact Wireless USB Mouse Emulates Roller-Controller
|
|
Tested and known working mice...
Brand: Logitech Model: M325, M317, M185 Brand: Microsoft Model: Mobile Mouse 3500 WARNING: Logitech M325S Is Not Compatible |
Follow the Discussions on AtariAge
CV-NUC+ A Miniature CV Motherboard is in the Works and for you builders... CV-NUC+ DIY Builders Thread Also Check out the ColecoVision Blog Postings |

High Quality NTSC Composite and S-Video Output... From the get go the decision was made to have the highest quality composite and S-Video output possible, thus allowing for a clean conversion to HDMI via an inexpensive sub-$20 converter. Mission accomplished. Wiistar WS-Z51 Composite/SVideo to HDMI Converter Resolution 720P/1080P Aspect Ratio 16:9/4:3 Audio Pass-Thru Low Lag 5V USB Power (connect to HDTV) |
Camera Shot: CV-NUC+ S-Video Output Converted to HDMI with Wiistar
|
|
Size does matter...
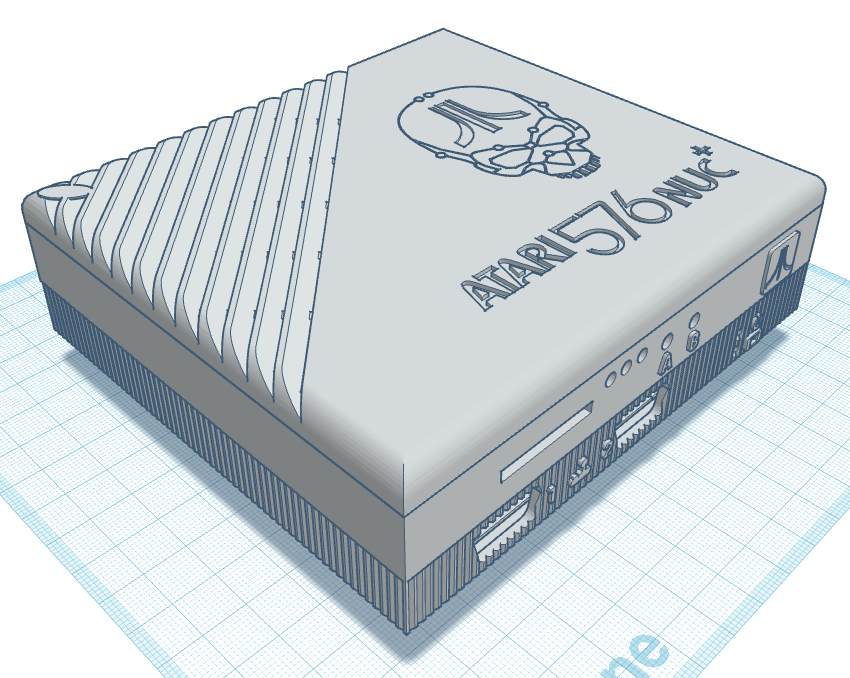
The project goal was to have a board with the exact same footprint of the 576NUC+ Main PCB at 4.5 inches square so that it could take advantage of an existing case design originally developed for that system. Whereby only requiring the specific holes and labeling to be added that would make it suitable for the CV-NUC+ instead. Also a cool feature of having the same footprint as the 576NUC+ allows for stacking the cased CV-NUC+ on top of the non-cart version of the 576NUC+. Thus a person can have the best of both worlds with a miniature Atari and ColecoVision console residing on their desk, while taking up the absolute minimum amount of desk space. For the most part that goal has been achieved, with the exception of the height which was increased by 10 mm in order to provide additional clearance for the CV-NUC+'s MSX Module. |
|


CV-NUC+ Specific Modifications by Mytek
|
Speaking of Cases...
To wrap this system up and give it that factory finished look, Steve Boswell (AtariAge member: Mr Robot) created a blank version of his unique 576NUC+ 3D printed case designs mirroring some of the prominent features of traditional Atari computers (400/800, XL, XEGS) that could be freely used for other projects such as this one. Wanting the best ventilation that could be achieved while still having a place to put the hole for cartridge insertion, the XL version with it's downward angled periphery vents became the starting point. Modifications were then put into play that transformed that XL blank case design into the CV-NUC+, by yours truly. Because of the possibility of having an optional internal keypad to supplement either standard Atari or Genesis controllers, two distinctly different lids are available. When printing a case, three STL files are required...
Each STL file should be sliced and printed individually in the default orientation to yield the best results. Printers with good bed adhesion will not require a brim or additional supports to be added prior to printing. For those that lack a 3D printer of their own, cases can be purchased at The Brewing Academy made on high end Ultimaker printers, and incorporating threaded brass inserts. | ||||
Programming is key...
There are 4 programmable devices in total that require flashing (three if you opt out on the internal keypad). The CPLD which acts as the MMU in this system requires a rather expensive programmer to flash it, so it's best to purchase this from The Brewing Academy as a pre-programmed part included in the DIY Bare Board Kit, or as a stand-alone purchase. In fact all of these kinds of devices can be gotten by selecting DIY+Chips in TBA's CV-NUC+ shopping cart, thereby easing the burden of having to buy any kind of programmer.
Exception: the CH554G needs to be flashed as part of a partially assembled board, but luckily this only requires an inexpensive Double Male USB-A cable and a PC -- TBA plans to do a minimal QUAD Board build that allows for pre-flashing this chip as part of the DIY+Chips Kit. So it will come with U2, C12, C13, R15, J4, and J5 already installed on the board (see Example).
- MSX MMU (Microchip/Atmel ATF1500A-10JU CPLD) - a pre-flashed chip will be available from TBA as part of the DIY Kit
- BIOS ROM (Microchip/Atmel AT28C64B-15PU EEPROM) - can be flashed with TL866II Plus programmer
- MOUSE CHIP (WCH CH554G MCU) - flashed via USB cable with Linux or Windows
- KEYPAD CHIP optional (Microchip PIC16F630-I/P MCU ) - can be flashed with TL866II Plus programmer
The MSX Module was equipped with a spot for a CPLD JTAG header which theoretically could be used to flash an alternative CPLD chip (ATF1502AS), but that is still experimental in nature and therefore will not be populated when buying the DIY Bare Board Kit.
Board Gallery

Build It / Flash It / Use It
|
PCB Gerbers (ALL)
Main Board, MSX Module, QUAD Module, CV KEYPAD |
|
Schematics (ALL)
Main Board, MSX Module, QUAD Module, CV KEYPAD, CPLD Logic | |||||
|
Firmware Flashing Files (ALL)
Includes programming software for the CH554G Mouse chip. |
|
Bill of Materials (ALL)
Main Board, MSX Module, QUAD Module, CV KEYPAD | |||||
|
Some Useful Test ROMs
Includes SGM test to verify MSX Module operation |
|
PCB Assembly Manual
Notes and Tips on assembling your CV-NUC+ for a successful outcome | |||||
