TK-II-XEGS(GS) Installation
The following series of photographs will serve as examples to aid in the installation of TransKey-II into the various models of Atari 8-Bit computers.
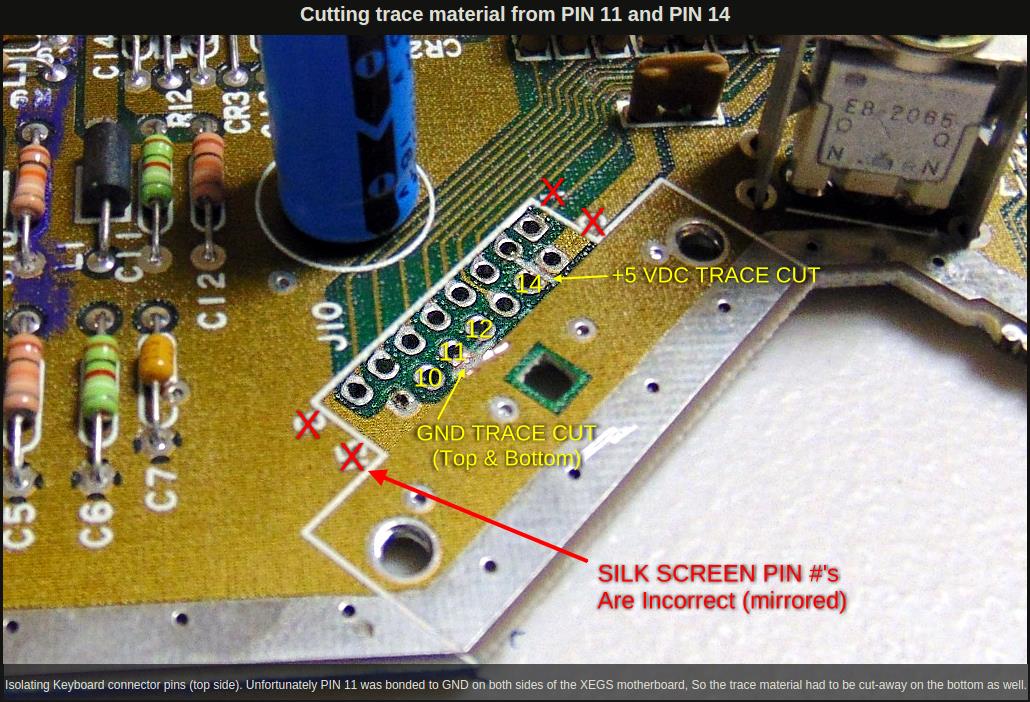
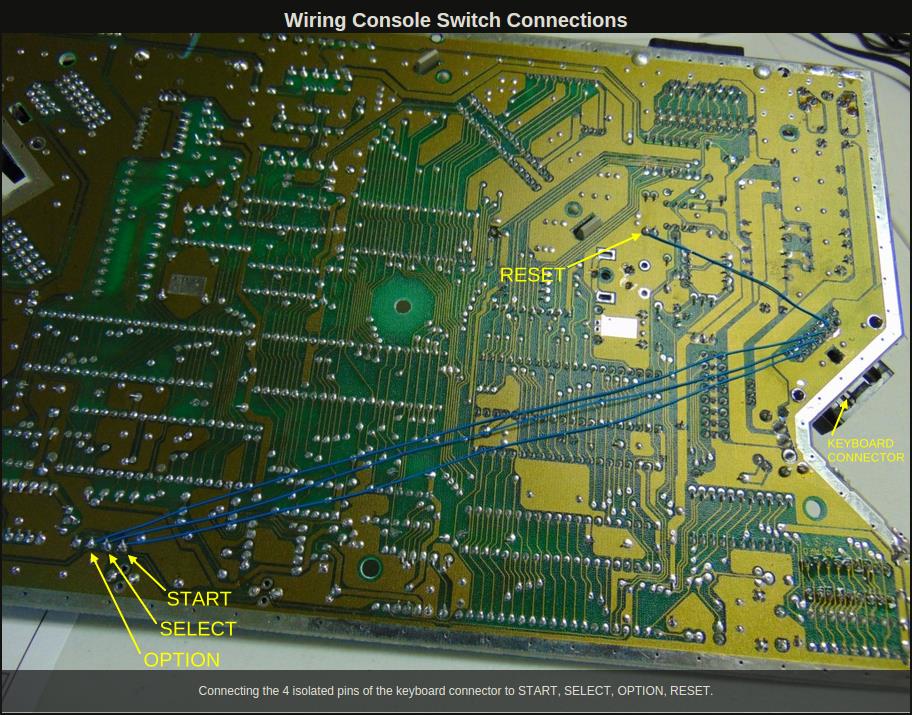
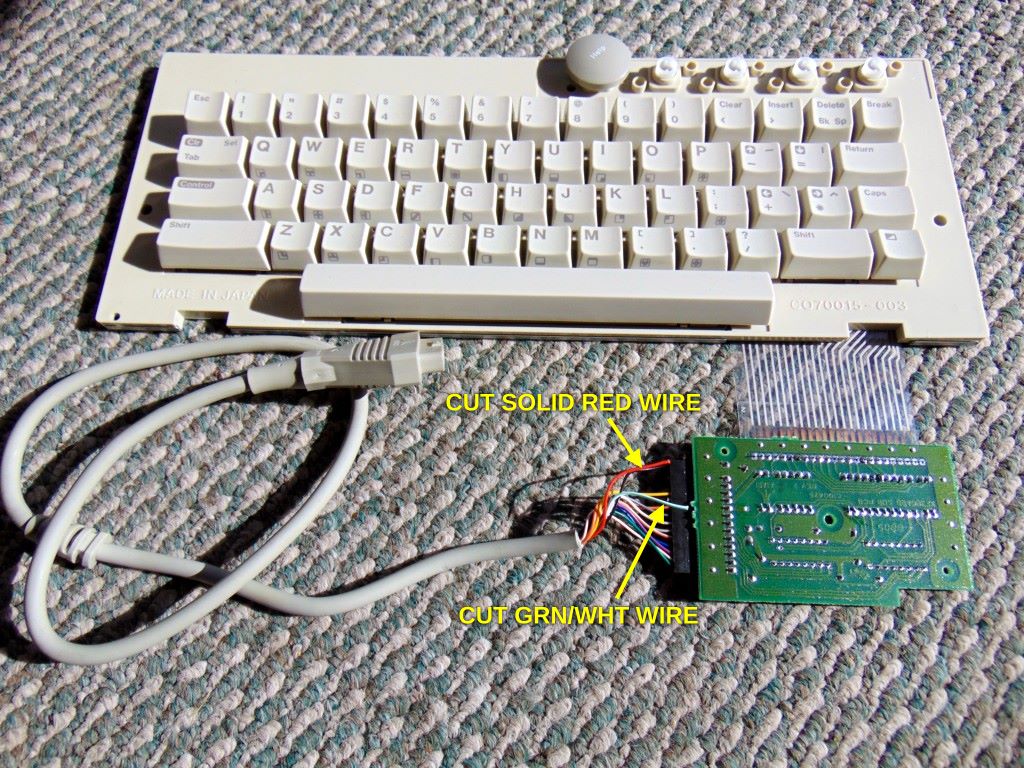
The first row of images shows specific modifications required when Console Key equivalents are desired from the TK-II-XEGS (or TK-II-GS) plug-in version. If you can live with the original console keys on the computer, then these modifications are not required nor recommended since it involves desoldering the keyboard connector and cutting board traces. Following these mods, the original stock XEGS keyboard will also require a mod of its own in order for it to still function, although this will not affect its operation on an unmodified XEGS, so no harm done.
Reset Jumper: Since the pin that TK-II-XEGS (or TK-II-GS) uses on the keyboard connector is already isolated (not used by the XEGS), this can be easily jumpered without removing the keyboard connector or cutting traces, so that pressing F8 on the PC keyboard will execute a reset.
The following series of photographs will serve as examples to aid in the installation of TransKey-II into the various models of Atari 8-Bit computers.
The first row of images shows specific modifications required when Console Key equivalents are desired from the TK-II-XEGS (or TK-II-GS) plug-in version. If you can live with the original console keys on the computer, then these modifications are not required nor recommended since it involves desoldering the keyboard connector and cutting board traces. Following these mods, the original stock XEGS keyboard will also require a mod of its own in order for it to still function, although this will not affect its operation on an unmodified XEGS, so no harm done.
Reset Jumper: Since the pin that TK-II-XEGS (or TK-II-GS) uses on the keyboard connector is already isolated (not used by the XEGS), this can be easily jumpered without removing the keyboard connector or cutting traces, so that pressing F8 on the PC keyboard will execute a reset.
TK-II-XEGS (or TK-II-GS): Enabling Console Keys F5-F8 (click on image to enlarge)

|
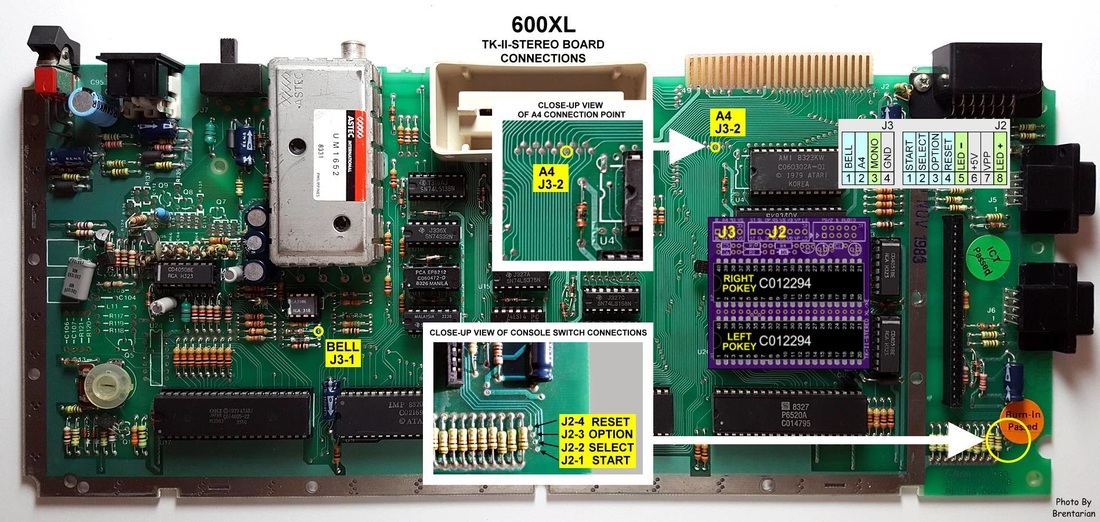
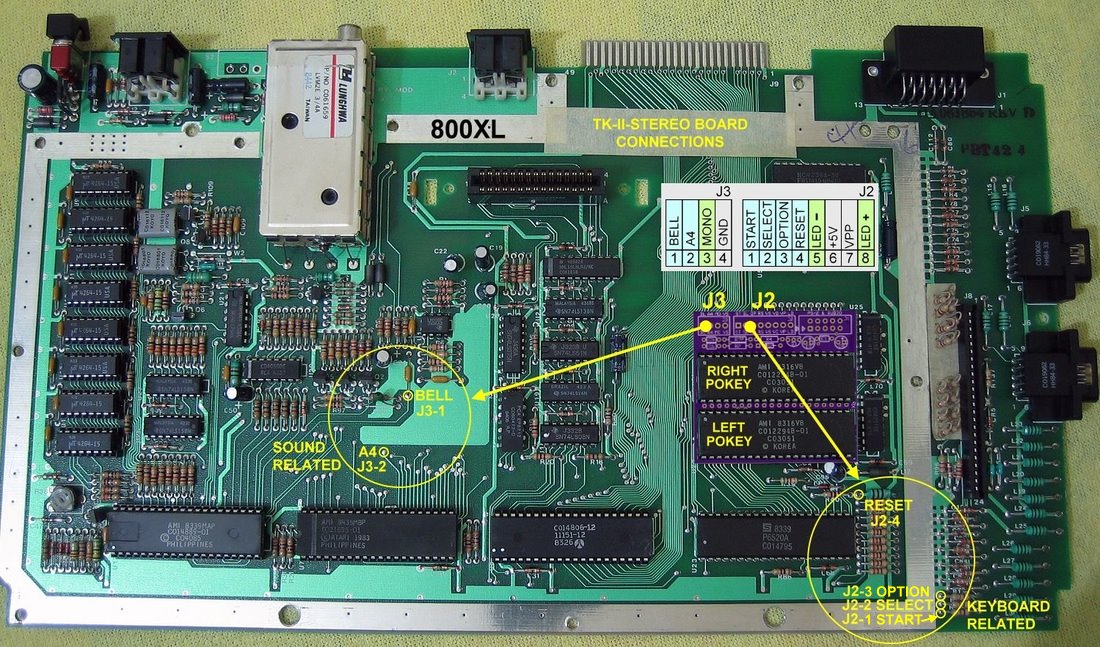
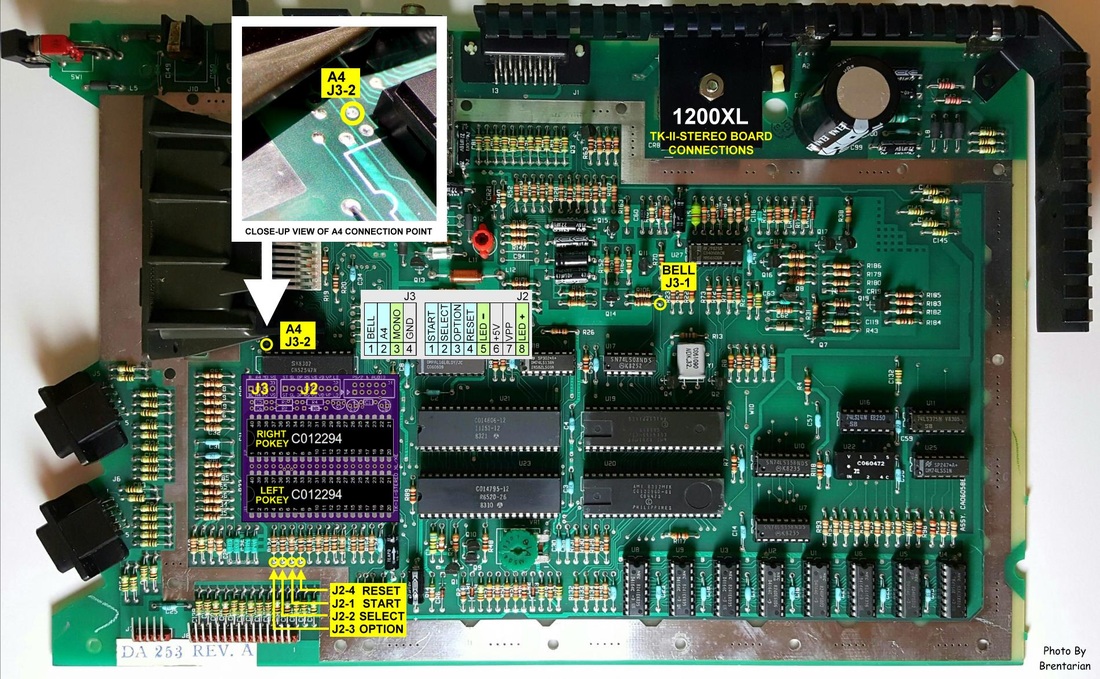
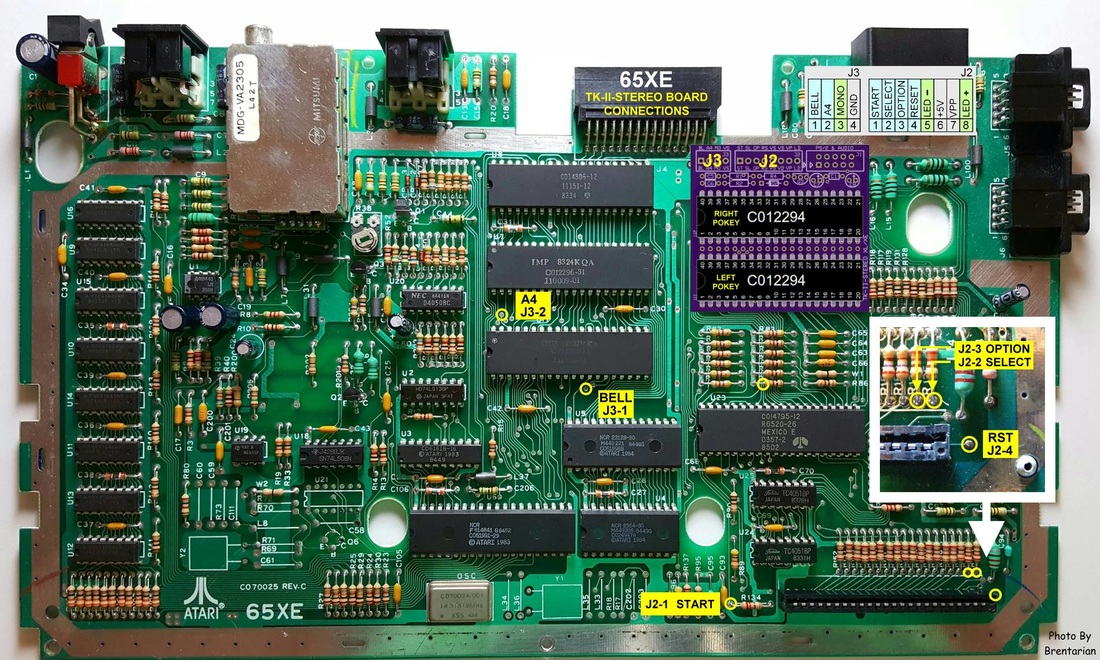
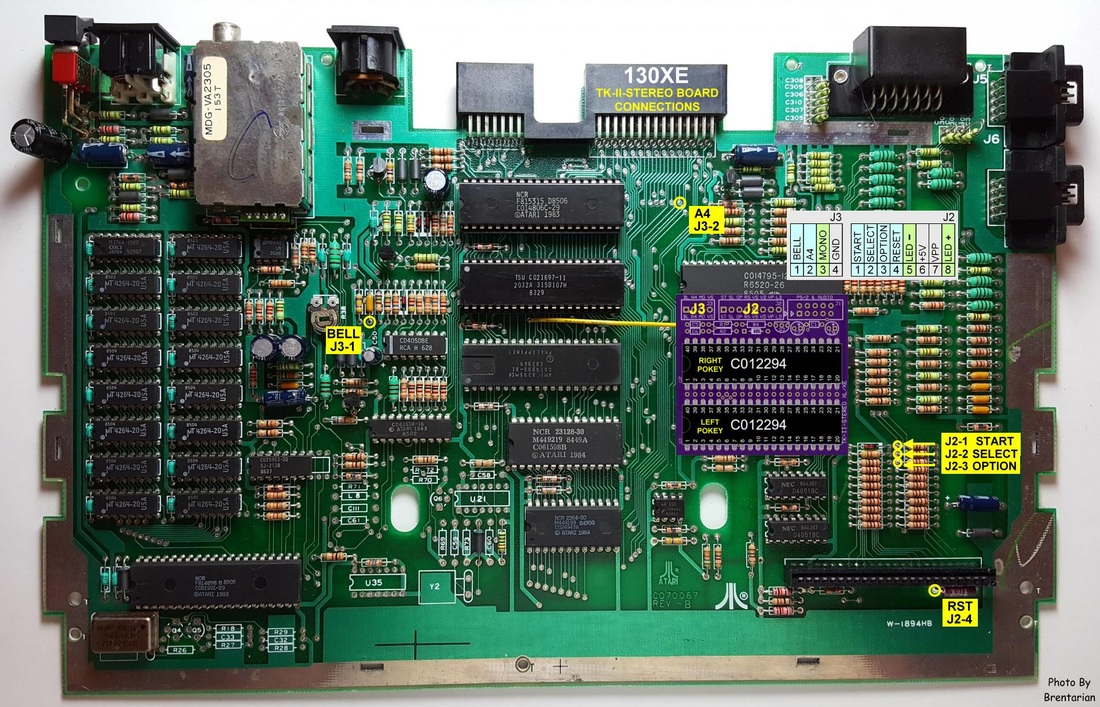
TK-II-STEREO Installation
|
These next photos show installation details for the piggybacked TK-II-STEREO board in all of the more modern A8 bit series computers, with some of the connection details also applying to the non-stereo piggyback version of Transkey-II.
(click on image to enlarge)
600XL 800XL 1200XL
65XE 130XE XE Game Machine

|
TK-II-PB Installation
|
For those of you that want a TransKey in your 800, the following photos were thoughtfully provided by Fuji-Man, showing a step-by-step process to install a TK-II-PiggyBack and Connector Interface board in an 800.
Warning: Only people proficient in soldering/de-soldering should attempt this installation.
