|
JOY-2-PIC Microchip PIC Programmer
Ever wish that your A8 could transform into a programming tool for those Microchip PIC MCU's that everyone's using for embedded projects now days? Well even if this never crossed your mind, it did for a couple of guys on AtariAge, thus setting off on a journey that resulted in the JOY2PIC Programmer. So how exactly does this work? Through the use of a voltage tripler, one of the joystick's 4 I/O lines is translated into what a PIC chip needs to initiate In Circuit Serial Programming. The other 3 bits of I/O are then used to communicate with the PIC, and through the use of a custom A8 software program, re-flash the program memory space with your choice of firmware (more info on PIC ICSP). |
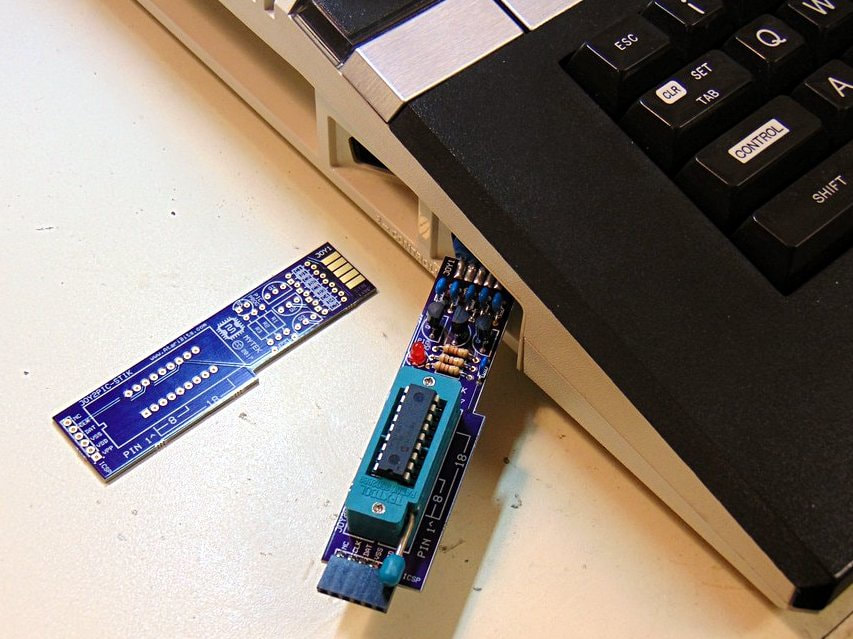
JOY2PIC-STIK ready for use on a 1200XL
|
|
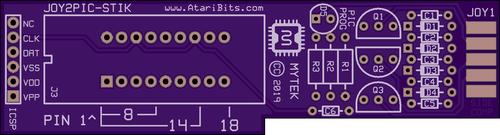
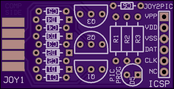
A full BOM is included with the schematic download file. Uses the same ICSP programming circuit as the original JOY2PIC, so any of the flashing ATR's that worked with it, will also work with the STIK. |
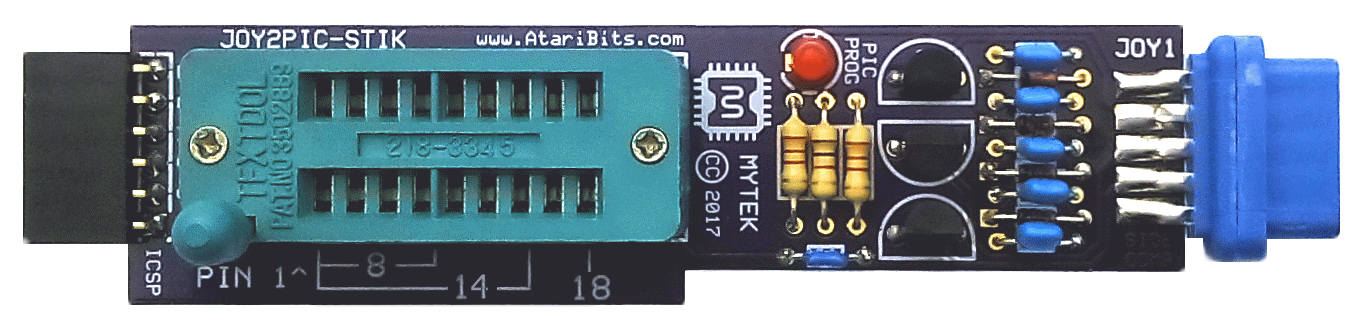
NEW JOY2PIC-STIK
Supports 8, 14, and 18 pin PIC12xxxx and PIC16Fxxxx series devices via the built-in Zero Insertion Force socket. No cables, chip adapters, or jumper selections required. So easy to use... Just pop in your PIC, plug it into your A8, load the flashing ATR, and press START to flash a chip
| ||||
|
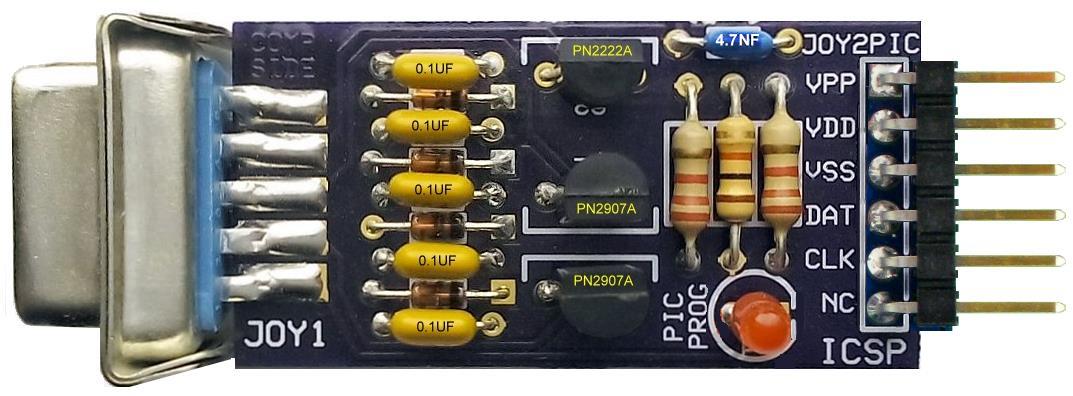
The Original JOY2PIC
| ||||||
How to Create an Atari Executable from Microchip HEX
All firmware file downloads on this site are already in an Atari executable format.
--- NO FURTHER PROCESSING REQUIRED ---
The following program discussion applies to when you wish to convert a MicroChip HEX file into an Atari COM file.
--- NO FURTHER PROCESSING REQUIRED ---
The following program discussion applies to when you wish to convert a MicroChip HEX file into an Atari COM file.
|
PicProg Program Author's Notes
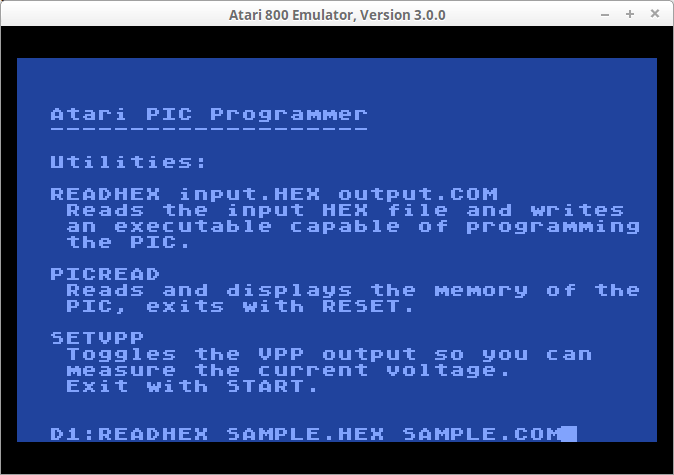
Usage:
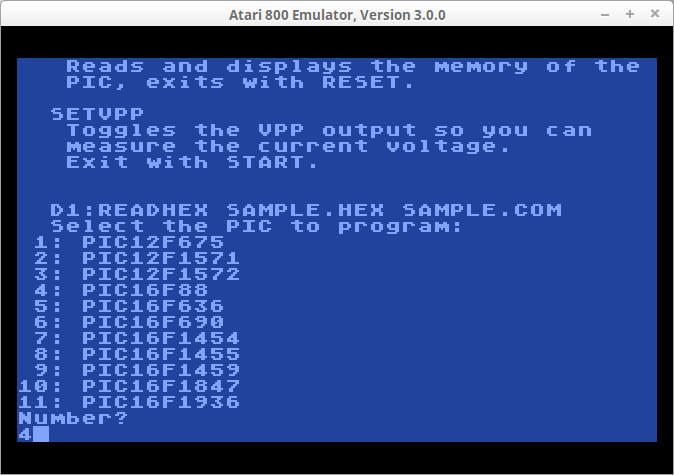
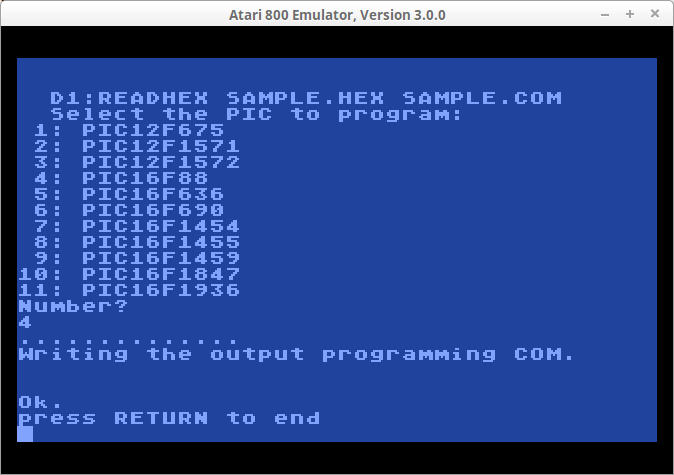
From the bwdos prompt, type: READHEX SAMPLE.HEX SAMPLE.COM Now, you see a prompt with the available PIC models. Select the one you want by entering the number and RETURN. This takes a while, reading "SAMPLE.HEX", and producing "SAMPLE.COM". If you omit the output name in the command line, the default is the same as input with ".COM" instead of any existing extension. If you omit both parameters, the program asks for the input HEX file name. After the end, press RETURN to return to DOS. Now, you have in the disk a new binary, run it to program the PIC. D1: SAMPLE Now, pressing START begins the programming. The background color flashes to indicate progress. The programming is a little slow, because I have limited the speed to one WSYNC per clock transition, this is about 7.7kbaud, and the programming protocol takes 28 bits for each word plus 3 ms of "programming time", so 2kword of PIC memory should take about 15 seconds. - Daniel Serpell This project was a joint effort by Daniel Serpell (dmsc) and myself, that began in December of 2015. The main thrust being to provide an inexpensive and easy to use method for the DIY person to update the firmware in the TK-II boards that were under development. It has since been put to use for a few other projects, and likely will find itself useful for even more to come. |

|
