It's getting down to the wire on releasing this thing hopefully within the next month or so. Several break throughs have occurred, ranging from fixes for video jail bars which were especially terrible over Composite, fixes to the MSX CPLD core, and finally a resolution on 5 AtariSoft games that kept ignoring keypad input not allowing them to start-up. And there's more...
I discovered this problem when finishing up the CV-EAV board I had been working on, which is pretty much a copy of the CV-NUC+ video circuit made for the original Colecovision game console. Although I had seen subtle jail bars on the image over the S-Video output on certain monitors, I had shoved this to the back of my mind because of other more important stuff I was trying to get done. However one day I hooked up the Composite monitor and pretty much got freaked out by what I saw. Horrible much worse jail bars could now be seen!!! In my mind this was impossible, how could I have missed this?
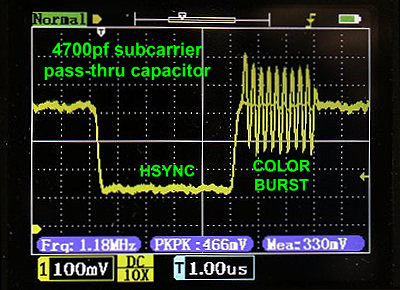
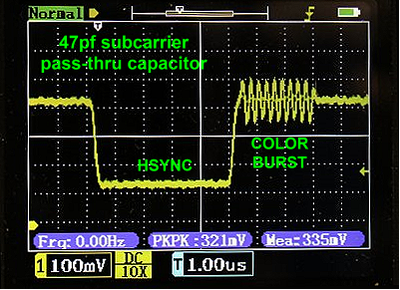
Well as it turns out I remembered some earlier tests via the Composite output that had looked just fine. So I asked myself "What the heck had changed?" -- and then I flashed back to when I improved the Chroma buffer circuit and was able to get the colorburst signal up to where I felt it should be, which at the time was about 2-1/2 times the poor amplitude I was seeing before. Just to be clear, there were benefits to this change that made it worth doing, such as blacker blacks with no green tint that can be a characteristic of many of the Composite, S-Video and some of the DIY RGB mods being done. So I started thinking that somewhere I had read an article in reference to the VDP chip and getting RGB out of it where the proposed fix for jail bars was to reduce the amplitude of the R,G, and B signals. This started to coincide with the change that I had made, where I had increased the amount of chrominance, and apparently the jail bars as well.
Well the simple solution was to decrease the chroma level until the jail bars went away, but not so far as to affect the color being produced on the monitor. This was accomplished with a reduction in the pass-thru capacitor. And I still ended up with good color saturation in spite of it. Go figure.
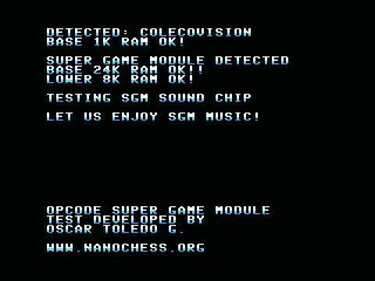 SGM Test as 1K Colecovision with SGM Capability
 When I first got the CV-NUC+MSX Module working, it was with the version 1.3 core which powered up the machine in an Adam memory configuration, starting off with 24K of the 32K SRAM being active. And yes it did pass the SGM tests as an Adam with an AY sound generator, but this was a CV not an Adam so that always bugged me. Anyway I thought I saw my mistake and came up with a version 1.4 core to fix it, and sure enough it passed the SGM test, starting out as 1K CV. So I thought I was good as gold at that point. NOT!!!
When I later checked several of the Pixelboy SGM games that I had previously downloaded, a bunch of them would no longer work. So getting flustered, I just put the version 1.3 core back in, and seeing that all the games now worked again I decided for the time being to call it good and to simply move on.
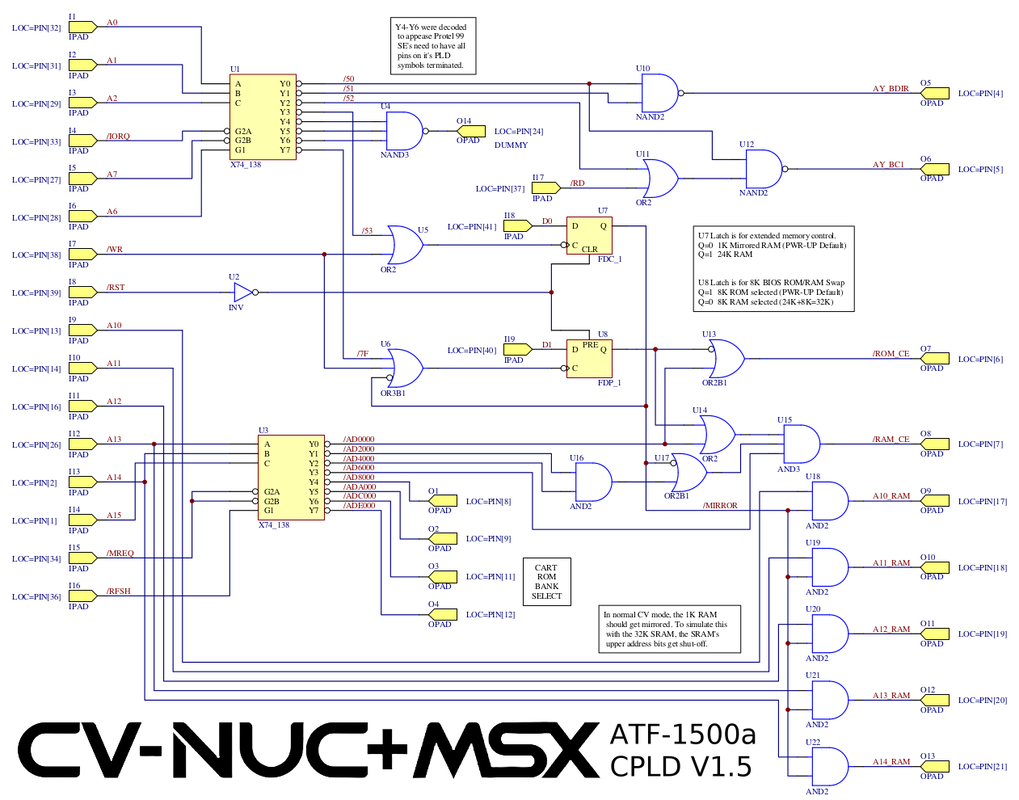
Well you know how that goes, I wasn't happy and decided to make another attempt. This meant hitting the books so to speak, and going over all the various things I had come across about how the memory banking worked. I also went back and double checked AtariAge member opcode's posts about how to test for the SGM module, and then I stared at the Protel CPLD schematic for a bit more.
All of a sudden it popped out at me that I hadn't truly disabled the 24K ram after all when in 1K mirror mode. After I added a few more gates, version 1.5 was ready to test.
Once again it passed the SGM Test as a real 1K Colecovision game console, and not as an Adam Computer. So far so good (fingers crossed). Next I started executing SGM enabled games, and one by one they all worked same as when my system was pretending to be an Adam so to speak. This was fantastic news, and confirmed that version 1.5 was working like it was suppose to.
For those that are curious, here is the new version 1.5 Protel CPLD logic schematic.
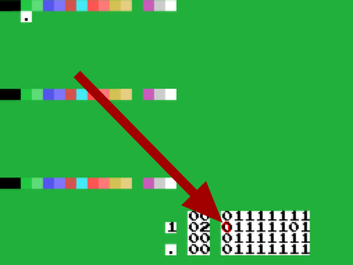 Joystick Test 2 - Keypad (2014) (Nitrofurano).rom
 This boiled down to figuring out why only 5 AtariSoft games refused to accept keypad input that would allow them to be played. Basically they would get stuck at the screen that would be requesting number of players, skill level, ect..
What was puzzling is why these games worked on an original CV but not on my CV-NUC+, which for all practical purposes appeared to be using a very similar controller interface circuit. Or at least it seemed that way.
Thanks to AtariAge member Falonn's sleuthing, he discovered what was so different about AtariSoft's start-up screen vs. most other games. Apparently Atari felt the need to pay attention to the highest bit of the 74LS541 controller interface chip. This is something not connected with the standard controller, but usually relegated to the quadrature circuit (roller-controller territory). So if that bit isn't zero when reading the controller, the keypad check will fail and the game will not move on no matter how many times you press a key.
When I ran the same test on the CV-NUC+ it had a one instead of a zero at that bit location -- a big no-no as far as AtariSoft was concerned. Well as it turns out I had used a pull-up resistor array across all 8 inputs of the interface chip, whereas Coleco only pulled-up the first 7 bits instead, thus relying on the quadrature circuit to pull that 8th bit down making it a zero.
After a little desoldering and adding a 10K pull-down resistor, all was better, and now I can play AtariSoft's versions of Centipede, Defender, Dig-Dug, Pacman, and Joust -- Success!!!
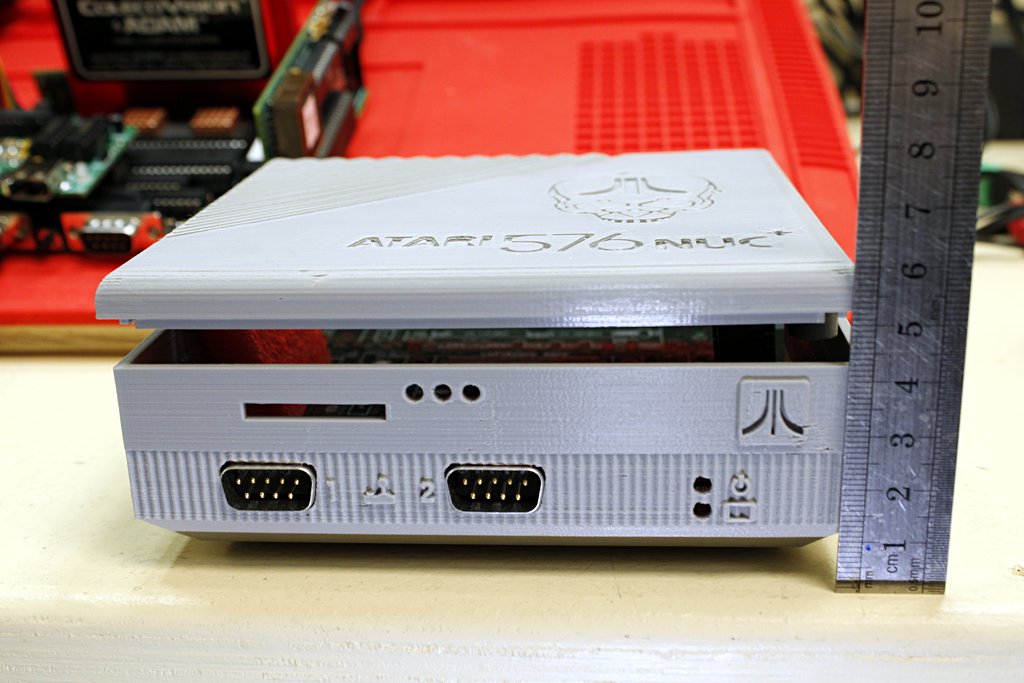
As we approach the launch date for a release, I really started thinking about the 3D printed case for this little dude. The original plan was to piggyback on the availability of one of the blank case designs that came out of the Atari 576NUC+ project, thanks to the generosity of AtariAge member Mr Robot. However there was a serious problem with that...
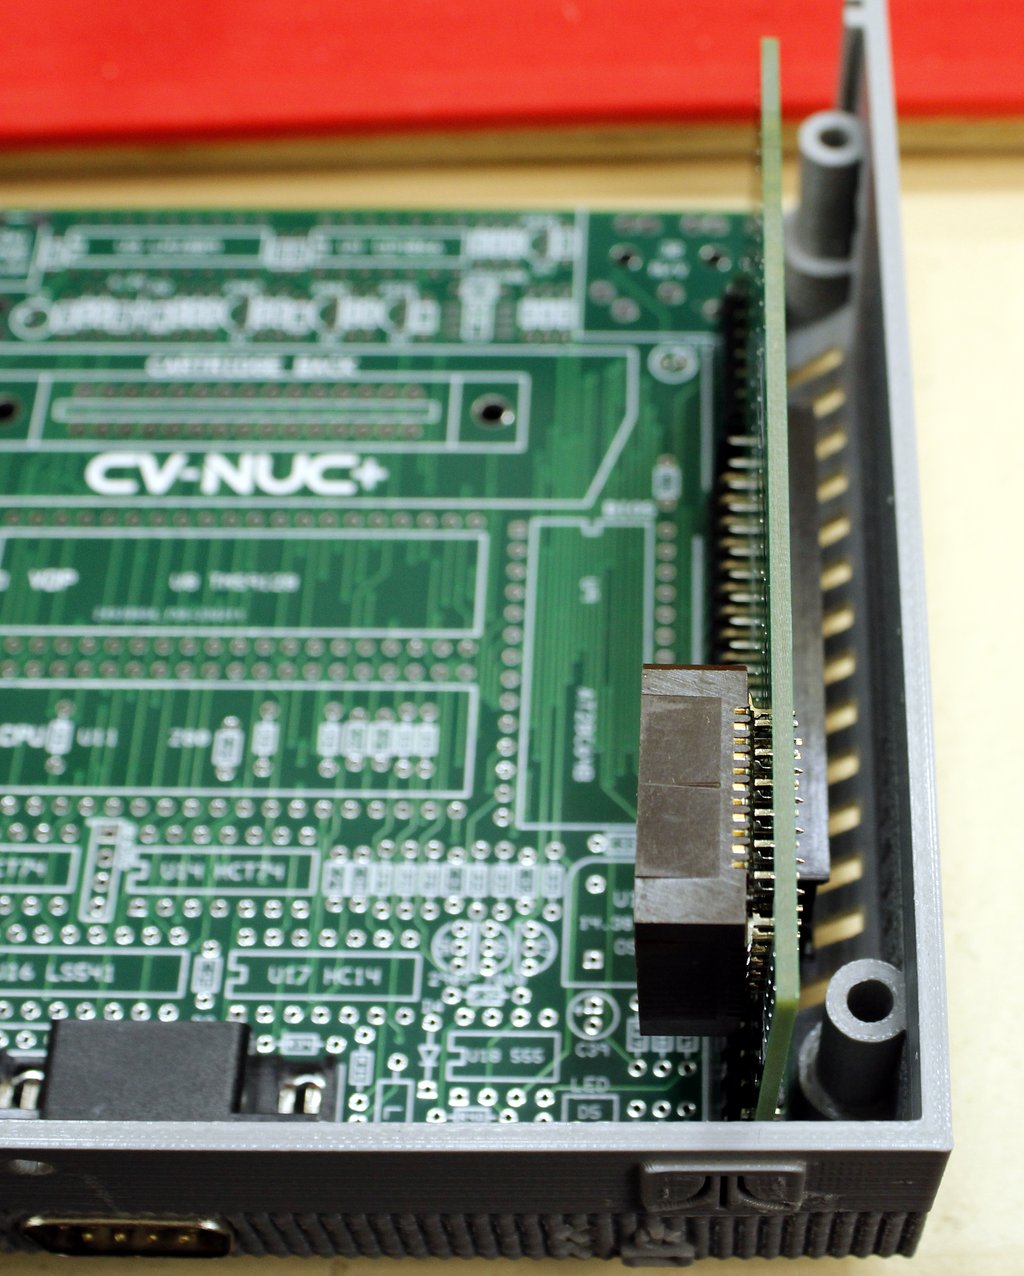
Because of the CV-NUC+MSX Module taking a bit more room, one of the screw posts of the case was getting in the way. To try and move it would have been a major task, and would have also possibly interfered with the symmetry as well. So I started looking at what specifically was causing the issue.
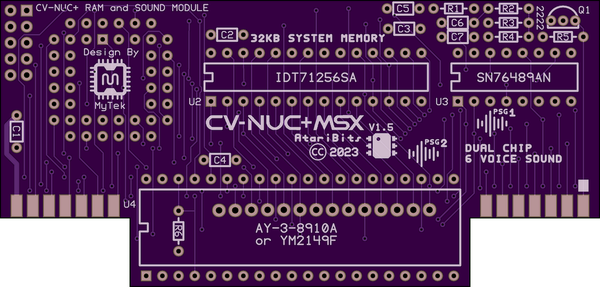
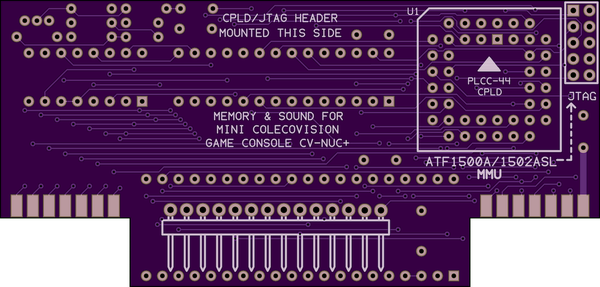
It was the CPLD over in that front corner that was at fault. So why not move it to the back side of the board instead? And that's what I ended up doing, as simulated in the photo below.
Yes there will be mice coming with this project, or at least a place to plug one in. Because Roller-Controllers are rarely going to be ok out of the box from the usual sources, I started thinking a while back that a mouse might be the way to go. To this end I also liked the idea of using a USB mouse, and even better one that could be wirelessly connected. Only problem was that I didn't really have the time to invent such a thing from scratch, or at least the actual translation from USB to Quadrature that the CV required. So I did what I always do when presented with such a situation, I start looking for an open source solution on the internet.
Here's what I found: https://github.com/jjmz/Atari-Quadrature-USB-Mouse-Adapter
Although it's original purpose was to interface with an Atari ST or an Amiga, it really gave me the essence of what I needed. So with a little bit of added circuitry (actually quite a bit of added stuff) I was able to make this work on the CV. However the more I played around with it, and started finding and trying different games that would work with it, I began to see the need to have the buttons cover more functions than to simply be fire buttons. So it evolved to the point of using all 3 mouse buttons.
GAME |
LEFT-Button |
MIDDLE-Button |
RIGHT-Button |
SLITHER* |
FIRE-UP |
FIRE-DOWN |
FIRE-UP |
ARMAGEDDON |
LEFT-MISSILE |
MIDDLE-MISSILE |
RIGHT-MISSILE |
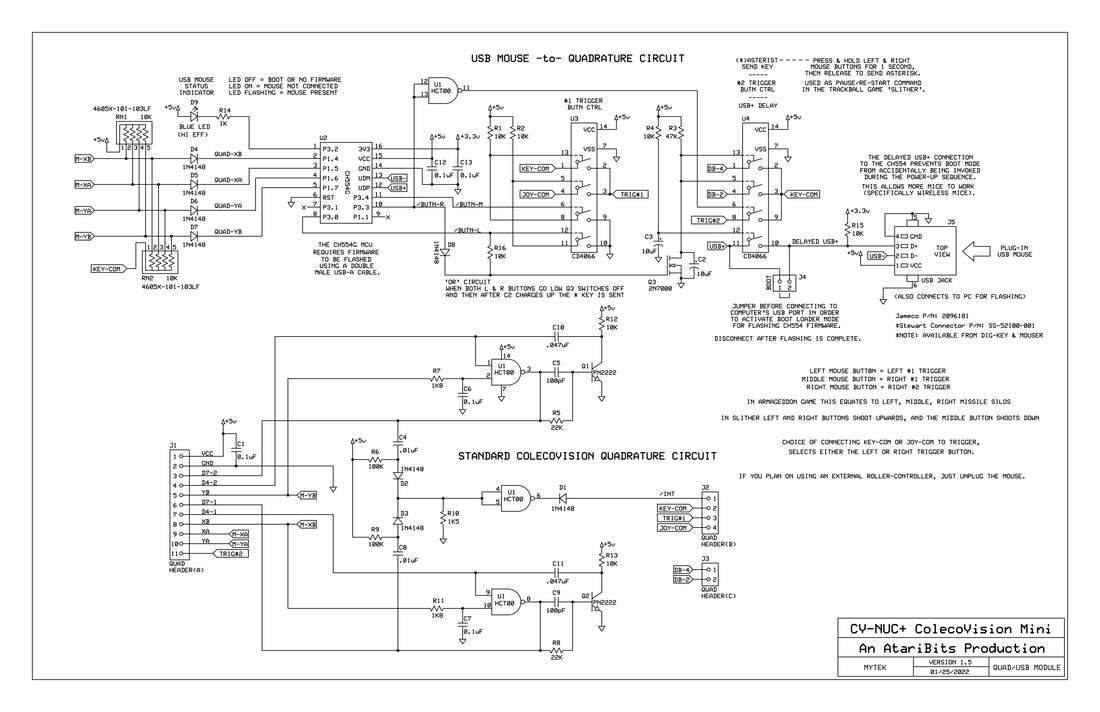
Since I was already designing a piggyback plug-in board to allow Roller-Controllers to work, it was a simple matter of just adding the mouse functionality to that same board. Here's a schematic of what it became, all based on the CH554G microcontroller chip and the open source mouse code that gets flashed into it.
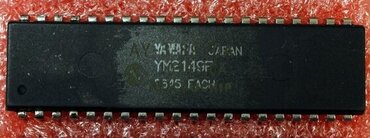 FAKE AY-3-8910A
 The CV-NUC+MSX Module also contains the two sound chips (SN and AY or Yamaha) so it also needs to contain an audio mixing circuit. I had tried a few different approaches in this regard, one using purely passive components, and another based on a single NPN transistor buffer added to the mix. Well after much fiddling I ended up using the later which also gave me sufficient drive to power un-amplified headphones if so desired. I also ended up adding a series RC filter network into the collector-base feedback loop to better balance the sound between the two chips. All in all this appears to work very well, and allows for tweaking each sound chip's volume level to obtain an even mix.
So you might have caught that mention of either an AY or Yamaha sound chip. There's a story behind that.
Well I started reading about all the fake AY-3-8910A chips being sold by the Chinese on eBay and AliExpress, and this got me curious about what I had purchased. So I took some acetone and a cotton swab and started rubbing on the top of the chip. Sure enough the swab started to turn black and revealed a Yamaha YM2149F label underneath. I had gotten a FAKE chip!
I then proceeded to do the same to all 6 chips I had purchased, with two of those coming from a different seller. They were all Yamaha chips underneath. Well all except for one, which was an AY-3-8910 instead of an AY-3-8910A (they had substituted an earlier version AY chip).
Getting a Yamaha YM2149F really isn't a bad deal, since it was a licensed clone of the General Instruments/Microchip AY-3-8910A, and for all practical purposes it works the same. This is also the same sound chip that the Atari ST used.
So now I started thinking what do I get if I order a Yamaha YM2149F instead -- will I get the genuine item? The answer to that will get covered in a follow up blog post.
It will, but realistically I think we are still at least a month to a month and a half away from that day if all goes as planned. But you probably know the old saying about the best laid plans...
Another small run of sample boards still needs to happen, including the main board to verify that all is ok after removing some unneeded components. And you know why I have to do this, because no change is ever simple and fool proof, and I don't want to get bit because I failed to double check something
Stay tuned for more to come, and to get even more info check out the AtariAge Forums CV-NUC+ Thread.
- Michael

 RSS Feed
