
C64-VGATE for Short Board
Today I finally had a chance to test a PAL version set-up in a 250469 Short Board that I converted from an NTSC 8562R4 VIC-II over to a PAL 8565R2.
It works!!! Including using the same VGATE firmware and the same component values as the NTSC version.
I was able to boot up and play the game Turricon in all of its PAL glory, and it looked quite good.
Initially when attempting the installation of the RF Modulator Replacement Interface PCB into the Short Board I encountered a couple of issues involving physical fit.
Update: May 2nd, 2024 Good news! I took a different approach to assembling the PCB and discovered that it could be made to fit without issues.
After mounting the motherboard with one mounting screw between the two existing DIN jacks in the C64C case... you can then set the RF Modulator Replacement PCB in place with the two bottom 4-pin and the single 2-pin support headers. Then adjust it to fit flush with the inside back of the case. After making sure that the board is pressed down and even, solder at least one pin on each header to lock in this alignment.
Note: the other 2-pin support headers on the left and right side are not required and should be left out.
When you remove the PCB you'll see that the support headers are slightly angled - this is perfectly fine. Note: an extra piece of header insulator block is used on all the support headers as an additional spacer. I'll probably make an adjustment on the final gerbers to allow these to be straight up and perpendicular with the PCB.

With the motherboard out of the case, use a stepped-drill to enlarge the RF output hole to 9/16" diameter. Then with a round file, create a U-shaped slot in the rectangular channel switch hole which will allow clearance for the 3.5 mm jack. This is a very minimal modification to the case, and could be reverted to the original RF modulator with hardly anyone noticing the case changes.
If everything is correct, then you should see the result below.

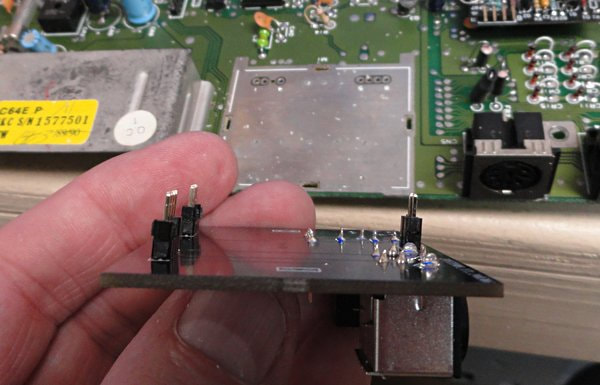
Assemble all of the required components into the PCB, and then mount and solder it to the motherboard.
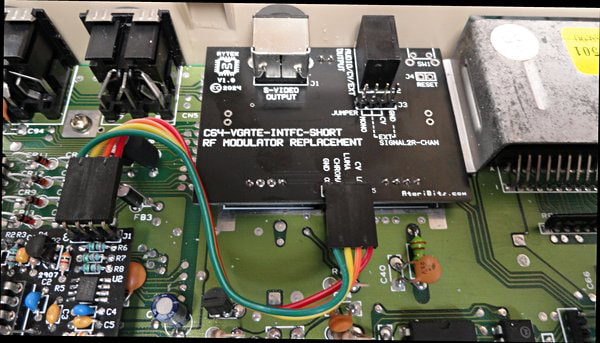
Short Board RF Modulator Replacement C64-VGATE Interface installed
 Removed Original Short Board VIC-II Socket
 When I mounted the MAIN C64-VGATE PCB into the VIC-II socket, it was friggin tight as hell !!! So I de-soldered it and replaced it with a 40-pin machine pin socket instead, which worked much better.
I didn't encounter this difficulty in my Long Board installation, so it appears that my Short Board used a different socket having very tiny holes.
This could be problematic for other people wishing to install one of these C64-VGATE boards in their machine, assuming it too has the same socket issue.
Since I'm feeling pretty good about the MAIN schematic, here's version 1.1 for download...
| C64-VGATE_V1.1_MAIN_schema.pdf |
Nice to see this work without having two different versions of the firmware, and with the same values that work for both the NTSC and PAL HMOS VIC-II chips. personally I've experienced less issues with sourcing the HMOS vs. NMOS VIC-II chips, and found them to produce a very clean picture, while giving off considerably less heat. Since my C64-VGATE MAIN board can also serve as an HMOS to NMOS adapter, I'll be sticking with HMOS chips for all of my video upgrades.
- Michael
Previous Post
 RSS Feed
