So what have I been up to? Quite a bit actually...
A few months back I got off on a tangent from my usual Atari stuff, and headed down the Colecovision path instead. Reason being is that I missed the boat on buying one of these in 1982, but had always intended to do so. Unfortunately I lacked the necessary funds at the time. So nostalgia kicked in and I found myself on an Adam/Colecovision forum at AtariAge. It's there where I discovered two alternative CV motherboards were either in process, or apparently been completed. This got the gears turning in my brain...
So per usual I started thinking how could I do this even smaller, possibly even 576NUC+ size.
To get this to happen I knew I needed to first understand how the CV was built, and to this end I discovered a great CV Schematic created by AtariAge member ChildOfCv. Next I needed a real Colecovision console to run experiments on -- enter eBay.

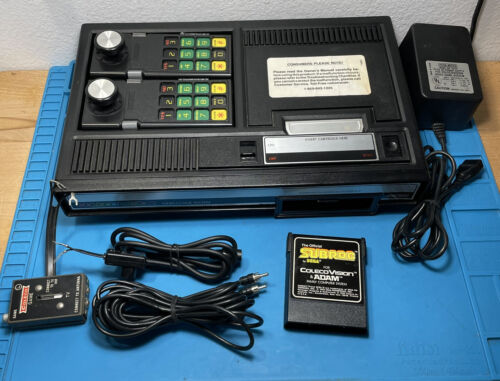
I picked up this console in very good condition for $100, and it came with everything you see here. the only problem being that it didn't work when I received it, which the seller had mentioned in the listing.
So no problem, I figured this would aid me in my quest to understand how a CV actually works by making me troubleshoot the dead one I just got.
Turns out that several of the video DRAM chips were bad, so I needed to change them. However that was easier said than done since all the chips were soldered in place. But after a marathon desoldering session (there are eight individual 16Kx1-bit DRAMs being used for video memory), I replaced the chips with sockets, and not having the 16Kx1 DRAMS on hand, I substituted some left over 64Kx1 chips from an Atari 1200XL. Next I made sure to do the board mods to eliminate the -5V and 12V that powered the original DRAMS, which not only wasn't needed anymore, but would have been destructive to the new 5V only DRAMs.
After the repairs were completed I powered it up and got crappy RF out that at least showed that the console was now working. But there was still a problem that was causing very erratic video output, and the system would occasionally hang. This was made even worse by touching the power switch or slightly flexing the PCB. Turns out I just got introduced to another common failure in a CV, and that is the slide power switch contacts being dirty. Since it switches 2 different power signals (+5V and +12V), when it starts getting flaky it does some very crazy things to the operation of the system. The usual fix is to spray it with DeoxIT and then rapidly switch it back and forth several times, but this failed to completely work for me (although it did help a tiny bit). The better fix is to completely disassemble and clean the switch contacts, but I was too impatient to do that and instead soldered jumpers, and then just plugged the power adapter into a plug strip and used it's switch to control power. This worked, and the system was now stable.
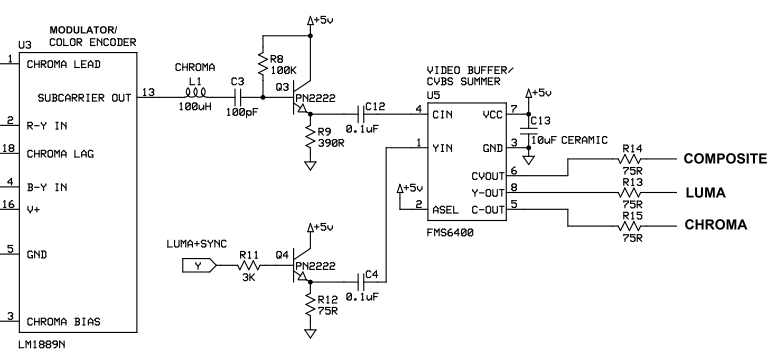
Next problem was to have something other than RF for the video output. Looking around the CV forums I discovered that a simple mod could be done to get composite video out of the console, documented by none other than Ben Heck. So I did that, and got a much better picture. However what I really wanted was S-Video for an even better result. This was no easy task to undertake at first glance, since the output from the video chip is R-Y, B-Y, and Luma (+sync). Basically Component video. Component is good, but I really wanted S-Video since many of my monitors support that.
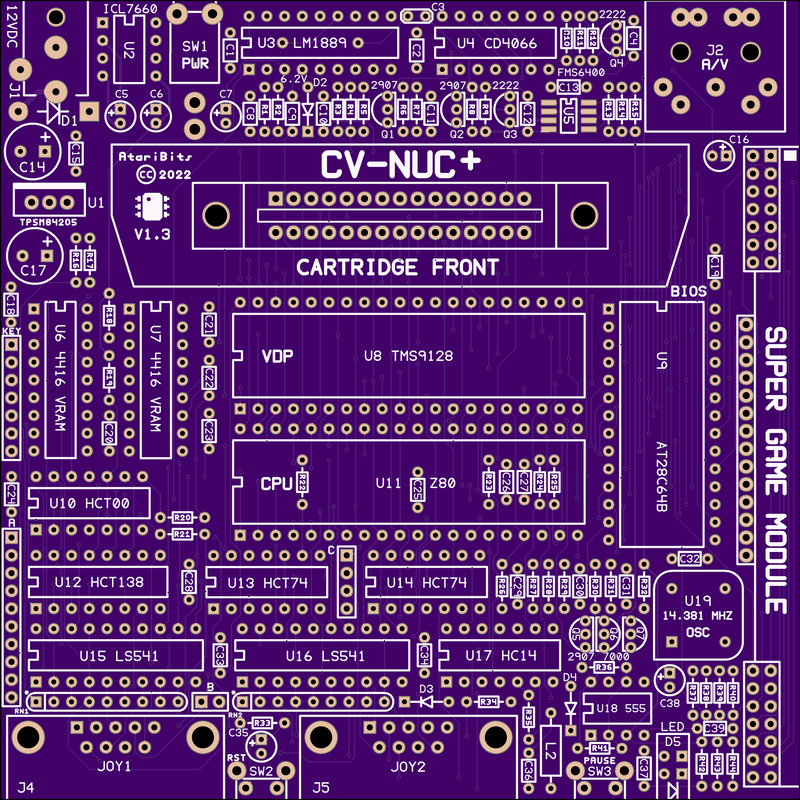
So now that we had a working console, it was time to move on to the original product idea, that being something I will call the CV-NUC+. This would be made small enough (4.5"x4.5") to fit into a slightly modded 576NUC+ 3D printed case. So as to be expected I made a few false starts in this endeavor, and of course things got more complicated as feature creep took over. But eventually the overall design started to gel and take shape.
Here's what the final form of the Main PCB design looks like today.
- Michael


 RSS Feed
